Customise Your Chart of Accounts
Your chart of accounts determines how accounts are organised in your Balance Sheet and Profit and Loss reports. Adding an account is straightforward, so this guide focuses on four common customisation tasks that may work differently from other accounting software.
What this guide covers
- Part A: Duplicate an account
- Part B: Move an account
- Part C: Update a total formula
- Part D: Add a group inside another group
🧭 Navigate to
Part A – Duplicate an account
Duplicate an account when you want to create a new account with settings similar to an existing one. Gimbla copies details such as the account type, group and cash flow category, so you only need to enter a unique account code and name, then review the copied settings.
1 Find an account with similar settings, then click its edit icon.
2 On the Edit Account screen, click the copy icon in the bottom-left corner.
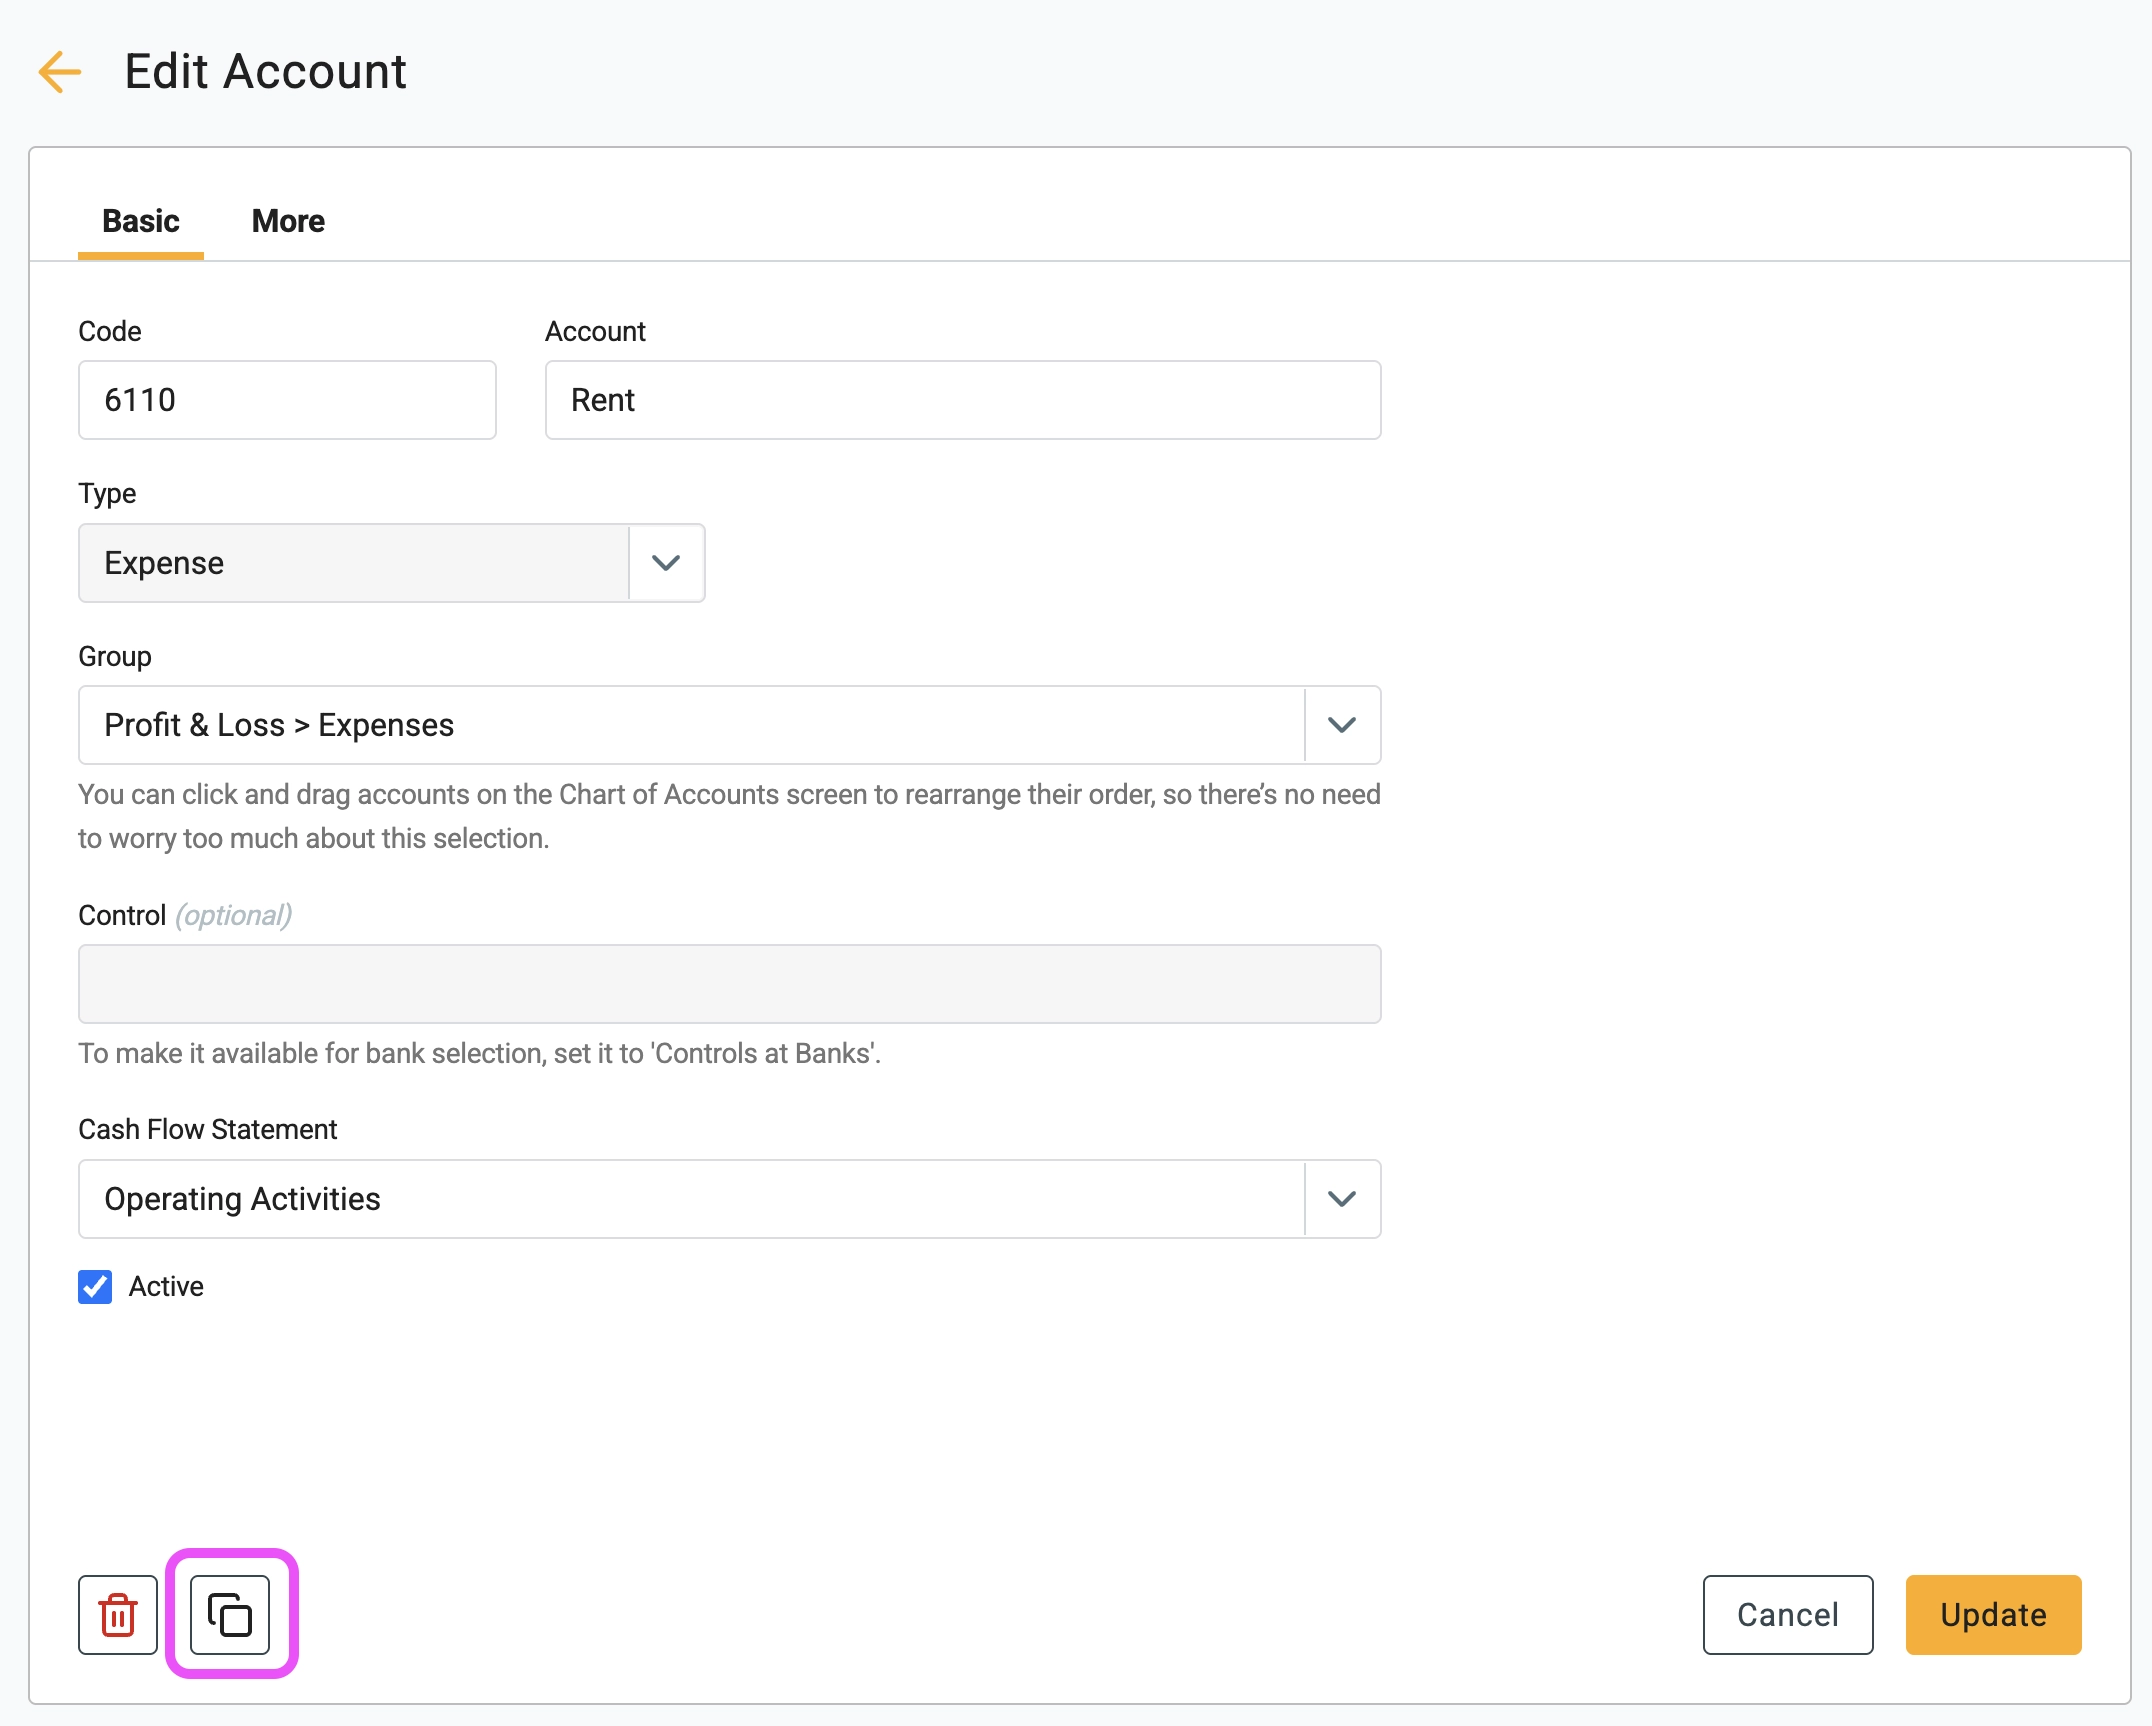
3 Gimbla opens a new account form with the original settings filled in. Enter a unique account code, update the account name, then review the other settings.
4 Click Create to save the new account.
Part B – Move an account
Your chart of accounts also works as a report layout tool. Move an account to change where it appears in your Balance Sheet or Profit and Loss report. You can reorder accounts or place an account in a different group to make your reports easier to read. This changes the report layout only; it does not change the account or its transaction history.
1 Click and hold the account you want to move.
2 Drag it to its new position. Release it when the correct row or group is highlighted. Gimbla saves the new position automatically.

Note: You can move an account only within the same financial statement. For example, you can move an Expense account to another group in Profit and Loss, but you cannot move it to the Balance Sheet.
Part C – Update a formula
Accountants and businesses may prefer to present the same accounting relationship in different ways. For example, the accounting equation can be shown as Assets = Liabilities + Equity or rearranged as Equity = Assets − Liabilities. Formula totals let you control how these calculations are presented in your reports.
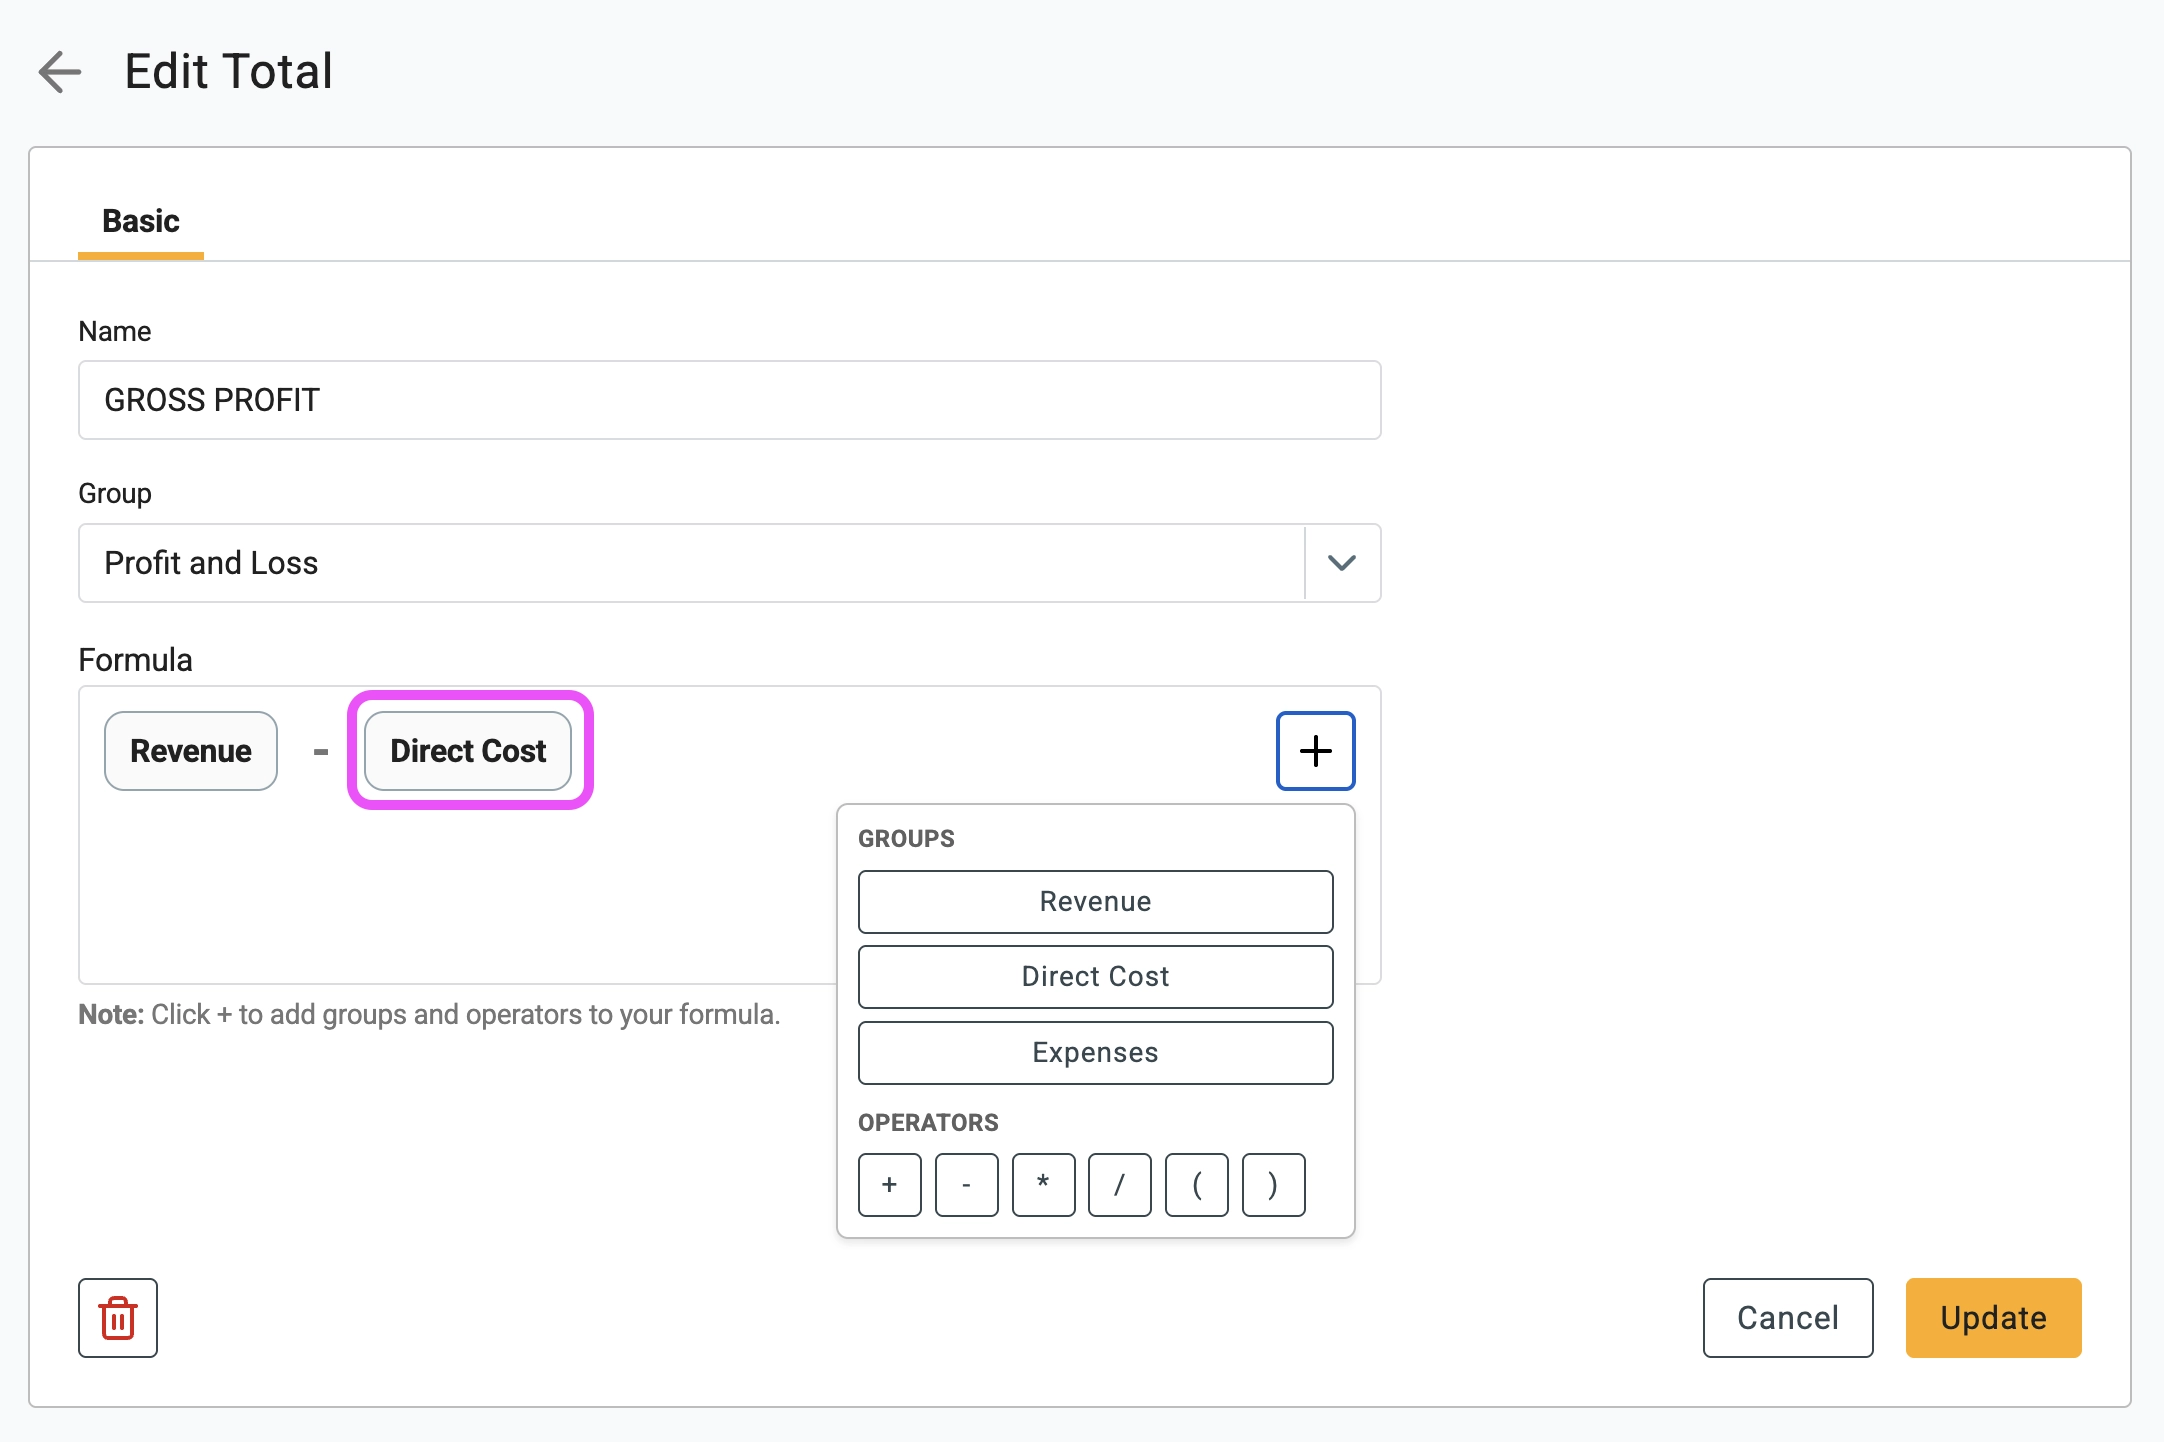
1 Find the total row marked with an equals sign and click its edit icon.
2 Click an existing formula item to remove it. Use the + button to add a group or an operator such as +, −, ×, ÷ or parentheses.
3 Check that the formula is in the right order, then click Update.
Part D – Add a group inside another group
Some accounting software organises reports using parent accounts and subaccounts. Gimbla uses groups and nested groups instead. A nested group sits inside another group and contains related accounts, providing the same type of report structure.
1 On the Chart of Accounts screen, click the Add Group folder icon in the top-right corner, highlighted below.

2 Enter a clear Name for the new group.
3 Select its Type, such as Expense. The type cannot be changed after the group is created.
4 Open Group (Optional) and select the existing group that should contain the new group. The full path helps you choose the correct parent group. Leave this field blank to create a top-level group.
5 Choose whether to Display Group Total, then click Create. Your new group will appear inside the selected parent group.