Add bank account or credit card
This guide will walk you through the two-step process of adding a new bank account or credit card to your Gimbla account.
When adding a new financial institution, you must first create an account in your Chart of Accounts and then link it to the Banking section. This offers flexibility but requires specific settings to ensure the accounts communicate correctly.
🧭 Navigate To
👣 Walkthrough
Let’s start by creating a bank account, and then we'll move on to adding a credit card.
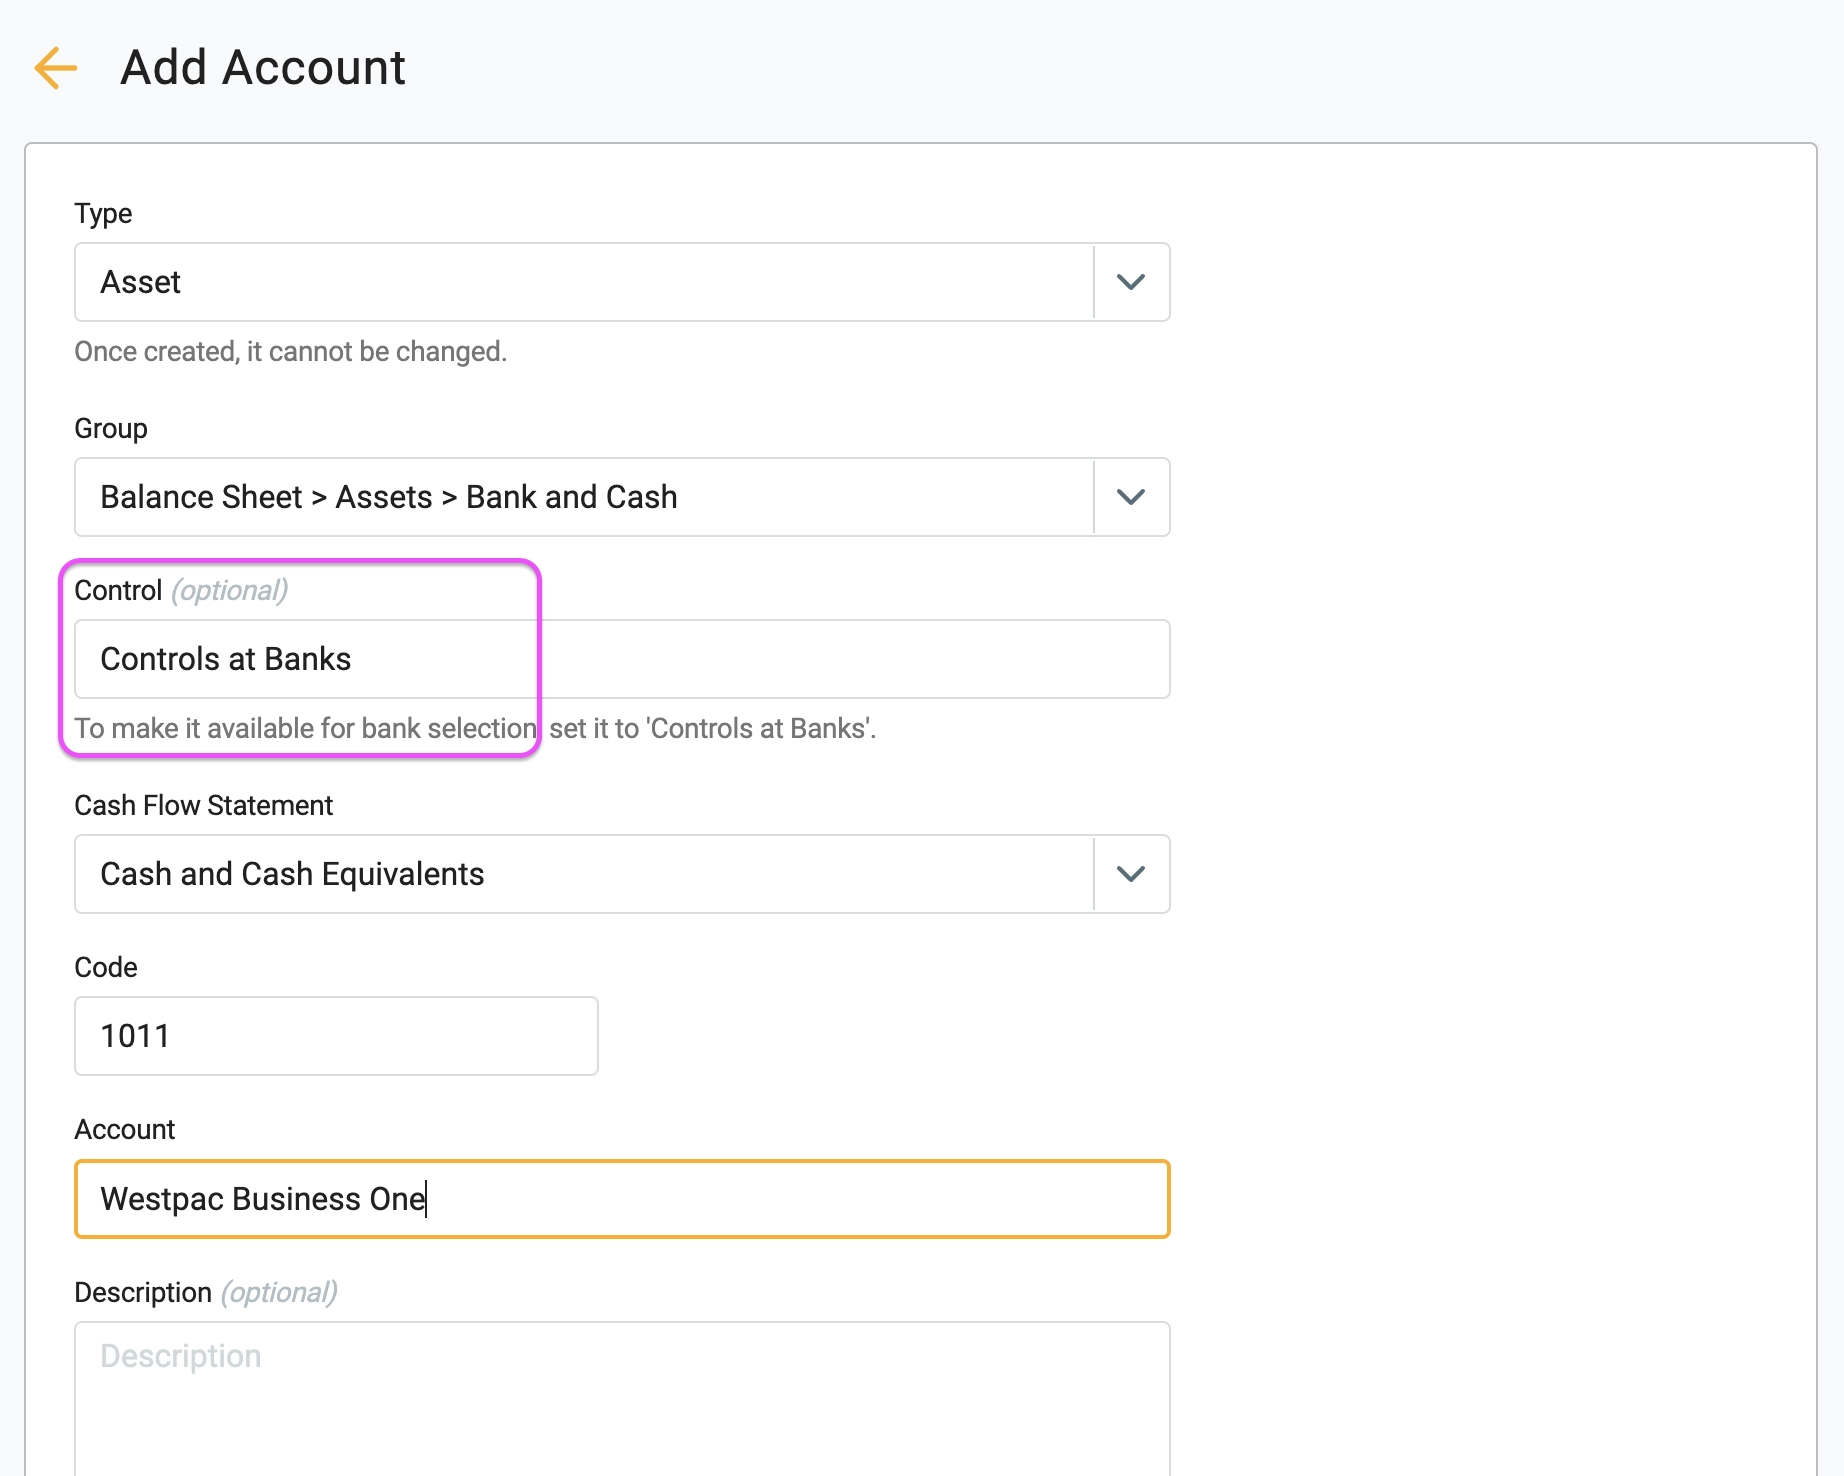
1 Before adding the bank, you must create the underlying ledger account. Navigate to your Chart of Accounts and create a new Asset account. Crucially, you must set the Control field to "Controls at Bank." If you do not do this, the account will not be available for selection in Step 3.
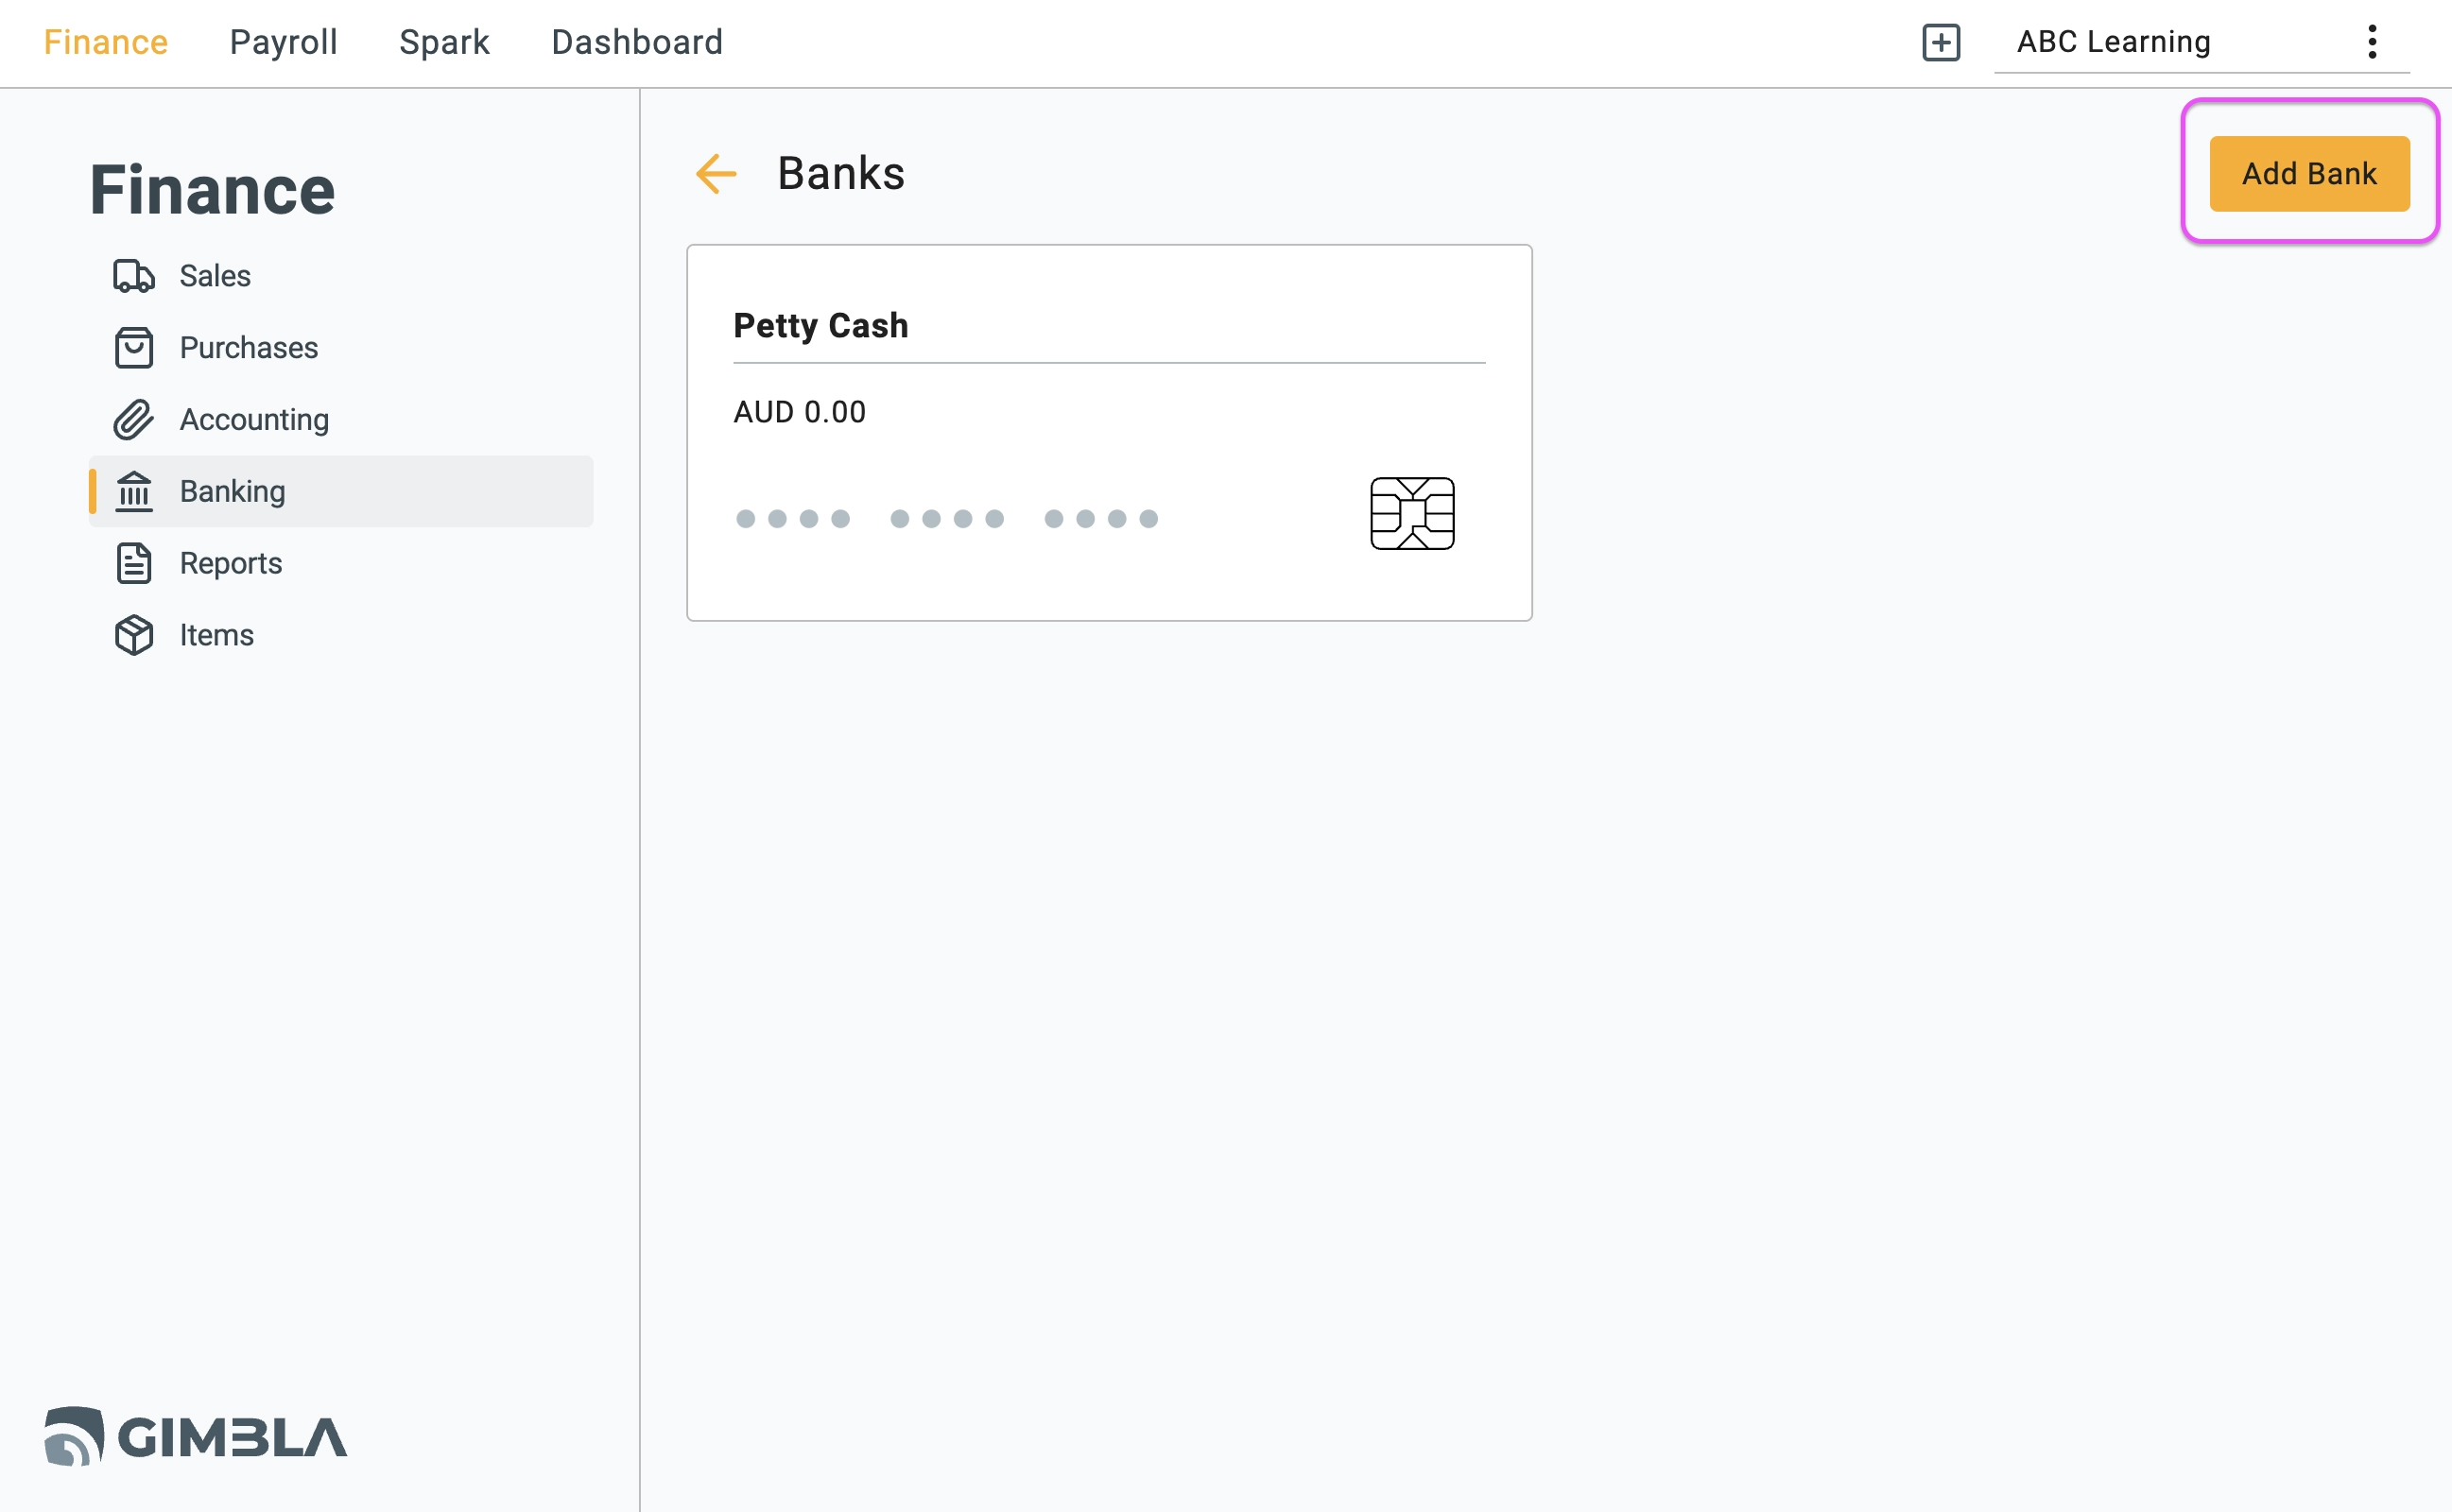
2 Once the asset account is created, navigate to the Banks section under the Finance menu and click the Add Bank button.
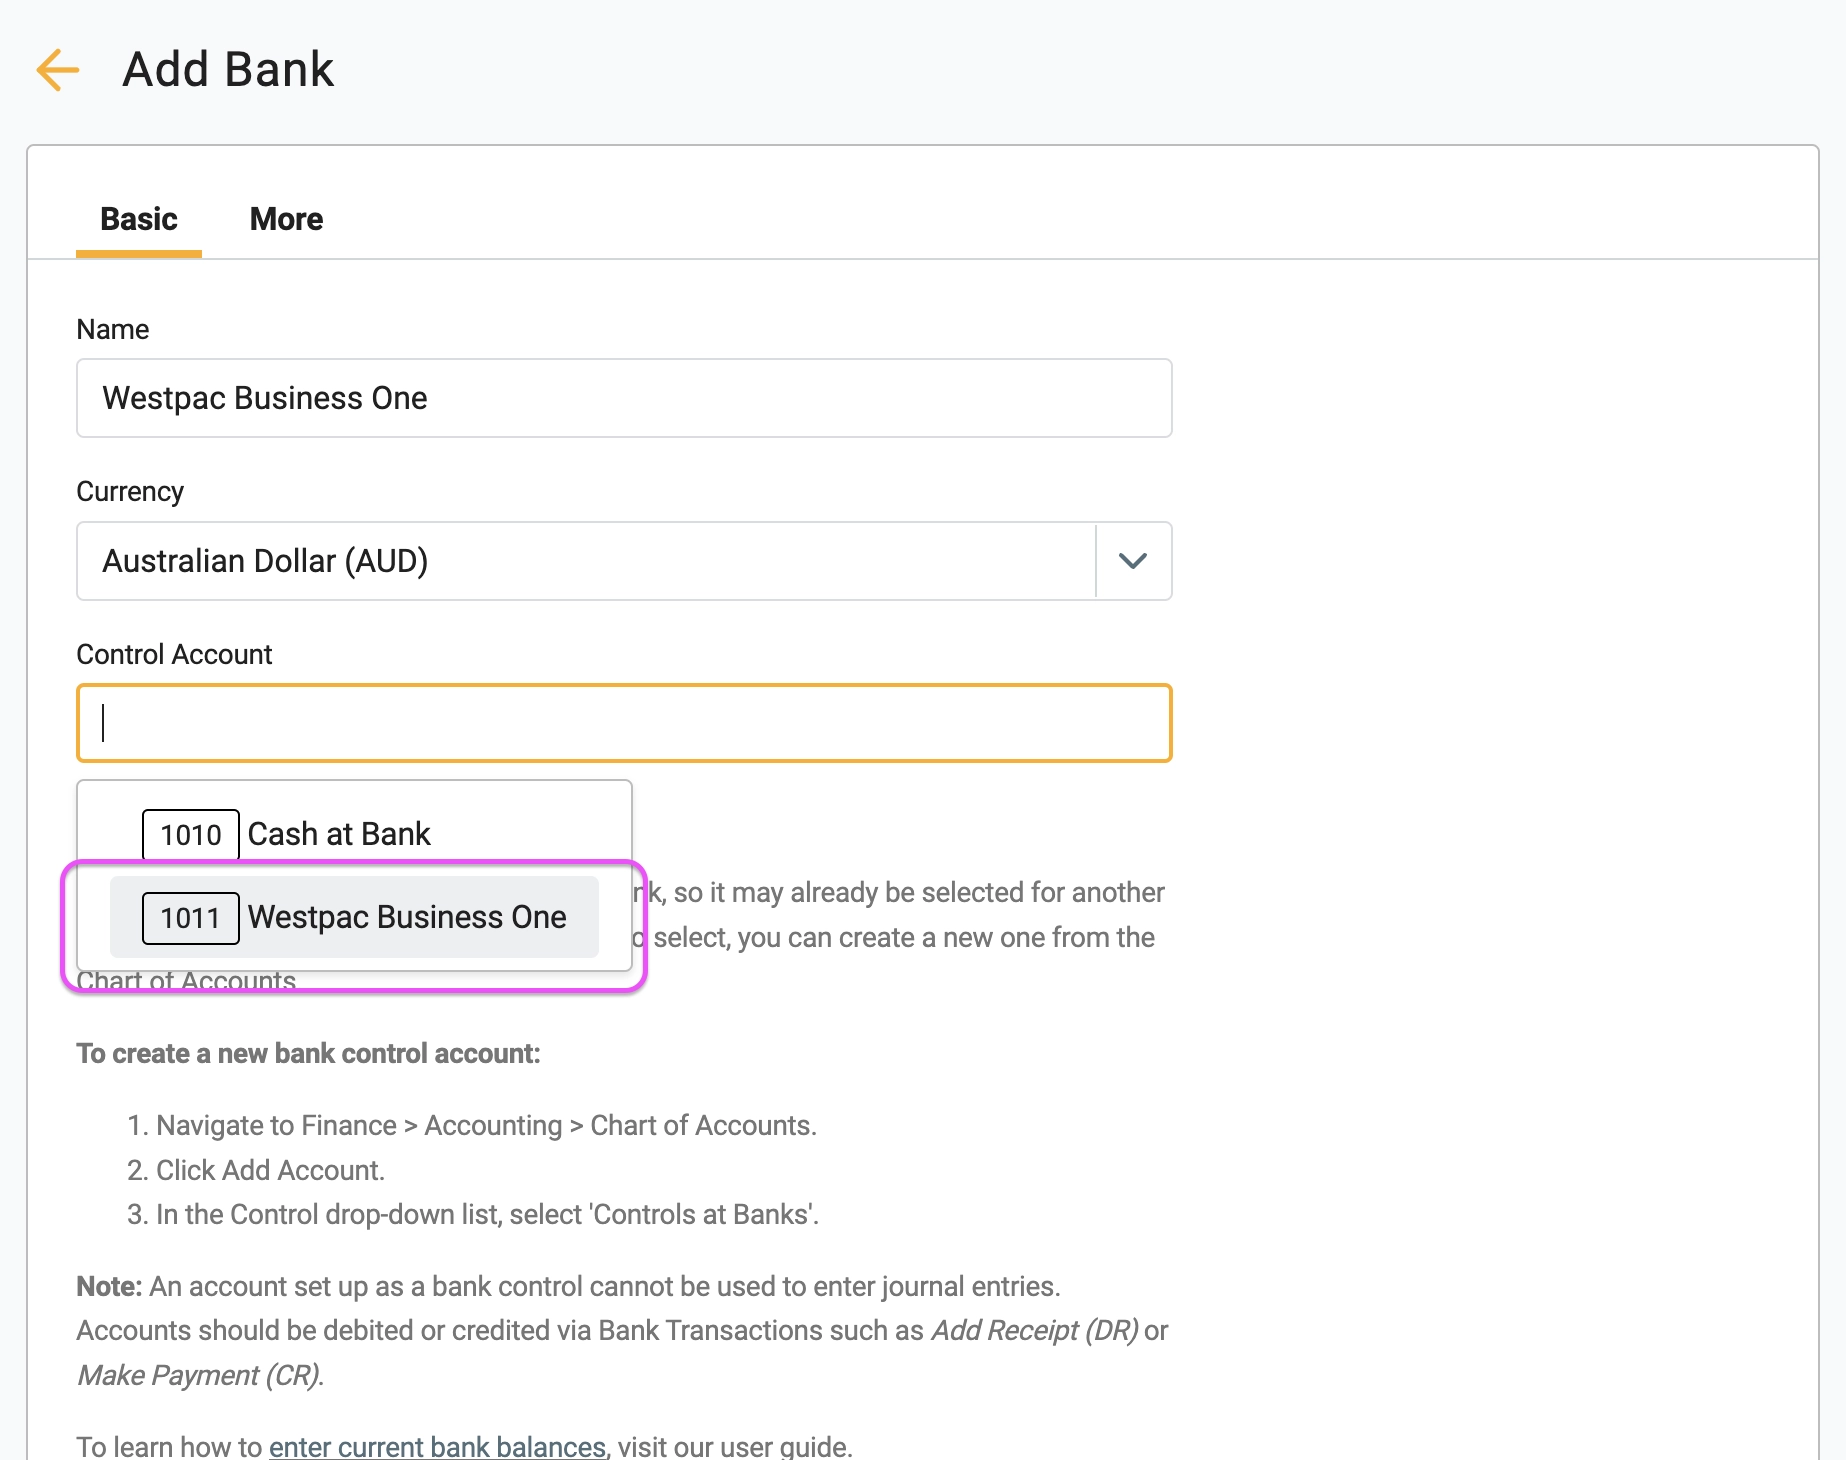
3 In the setup form, enter the Bank Name and Currency. When you click the Link Account dropdown, the asset account you created in Step 1 will now appear for selection. Select it to link your ledger to the bank feed and click Save.
♻️ Adding a credit card
To add a credit card, follow the same steps. However, in Step 1, create the account as a Liability account instead.
🖇️ Notes
Take a minute to review how to handle Credit Cards and why the "Control" setting is vital. A brief description of the key points follows:
- Controls at Bank – This setting acts as a bridge. It tells the system that this specific General Ledger account should have special banking features enabled (like reconciliation and statement imports).
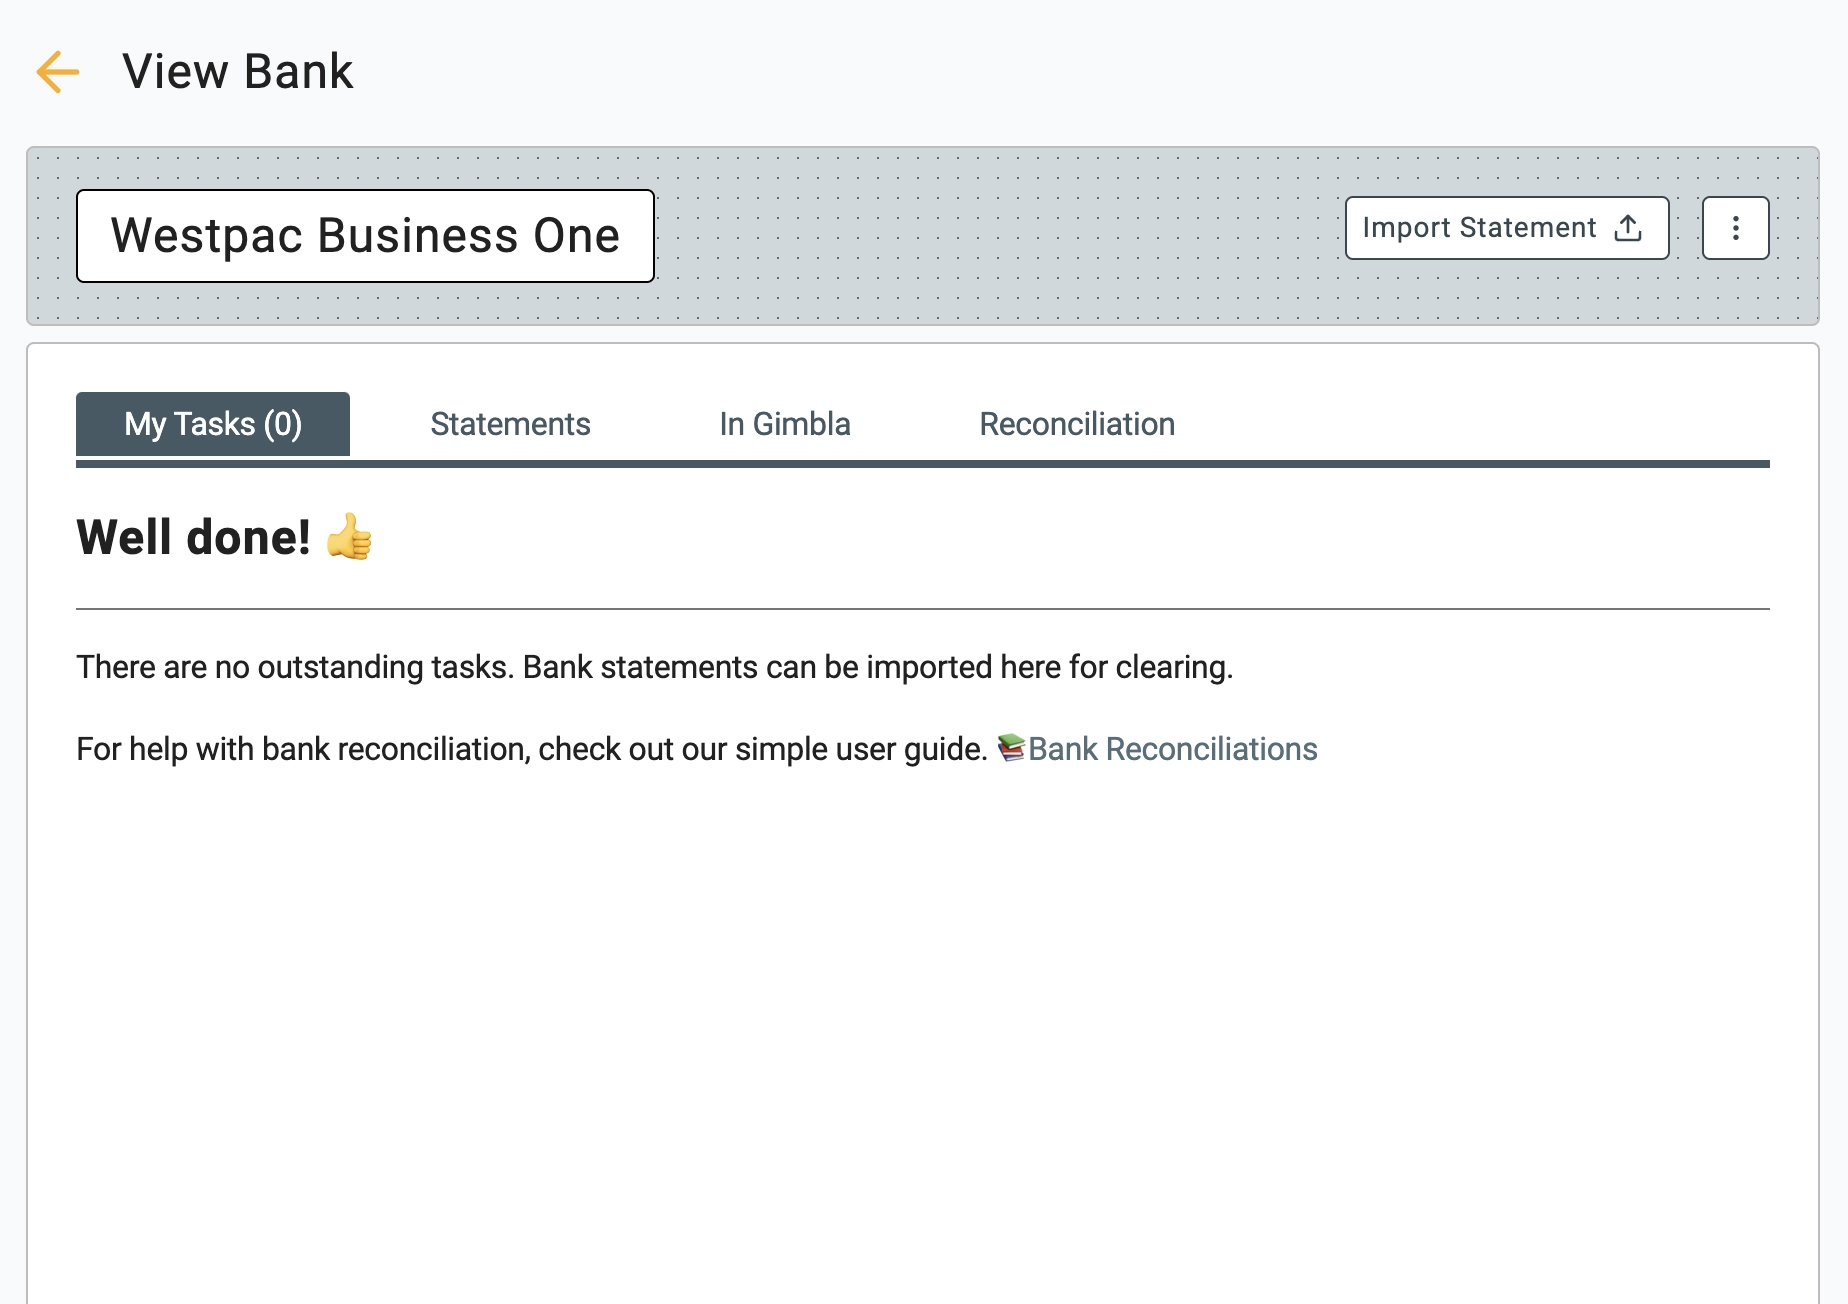
- Importing Data – Once your bank is set up, you will see an "Import Statement" button. This allows you to upload CSV or QIF files from your online banking to clear transactions.
▶️ Video Tutorial
Prefer to watch? Our video guide walks you through the entire process.