Opening bank balance
Entering an opening bank balance is as simple as creating a new receipt from your bank. This will increase the bank balance from the receipt date. If you are still setting up the file, start with the add a new business guide first.
⚠️ Important: The opening balance should not be recorded as a journal entry.
🧭 Navigate To
👣 Walkthrough
For this example, we enter $100 as our opening bank balance on 3rd July 2025.
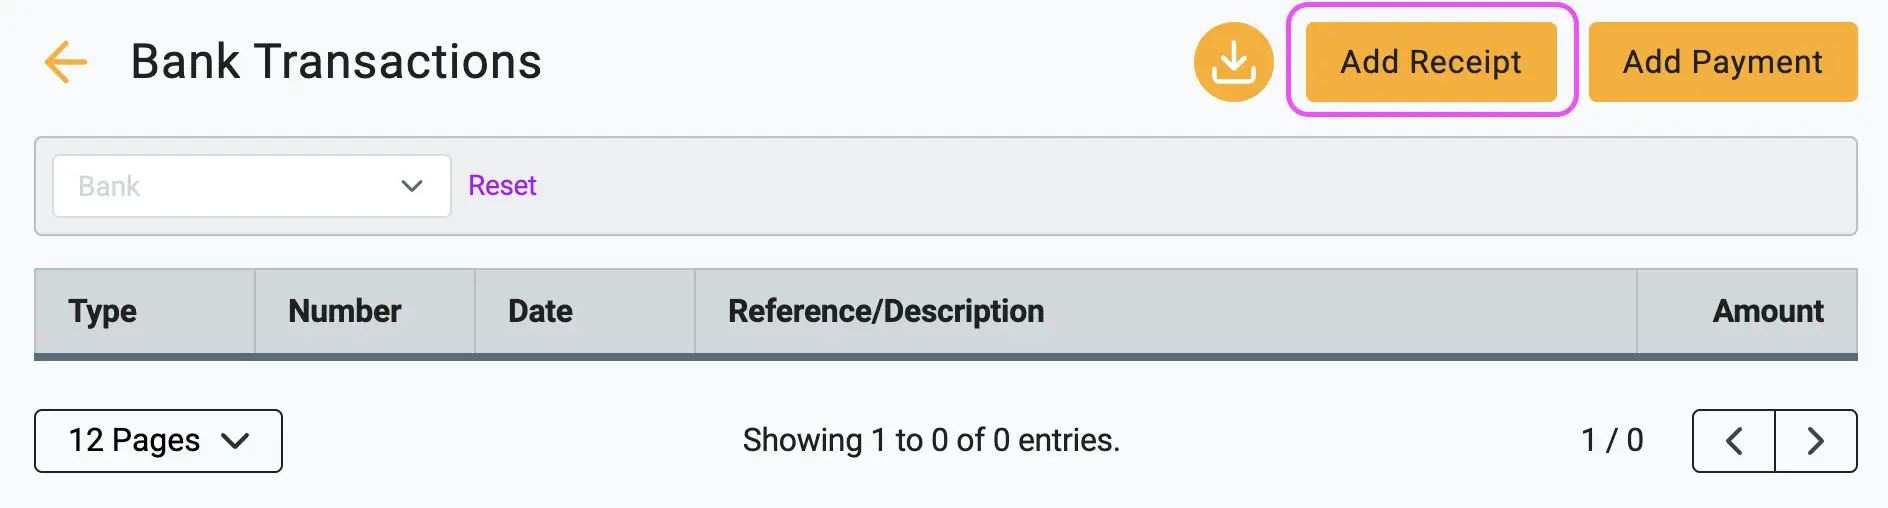
1 Click on the Add Receipt button in your bank transactions.
2 Fill out the form
- Description: Enter "Opening Balance."
- Price: Enter the starting balance amount (e.g., 100.00).
- Account: Select an Equity account from your Chart of Accounts. Common choices are Owner's Capital or a dedicated Opening Balance Equity account.
- Tax: Leave this blank.
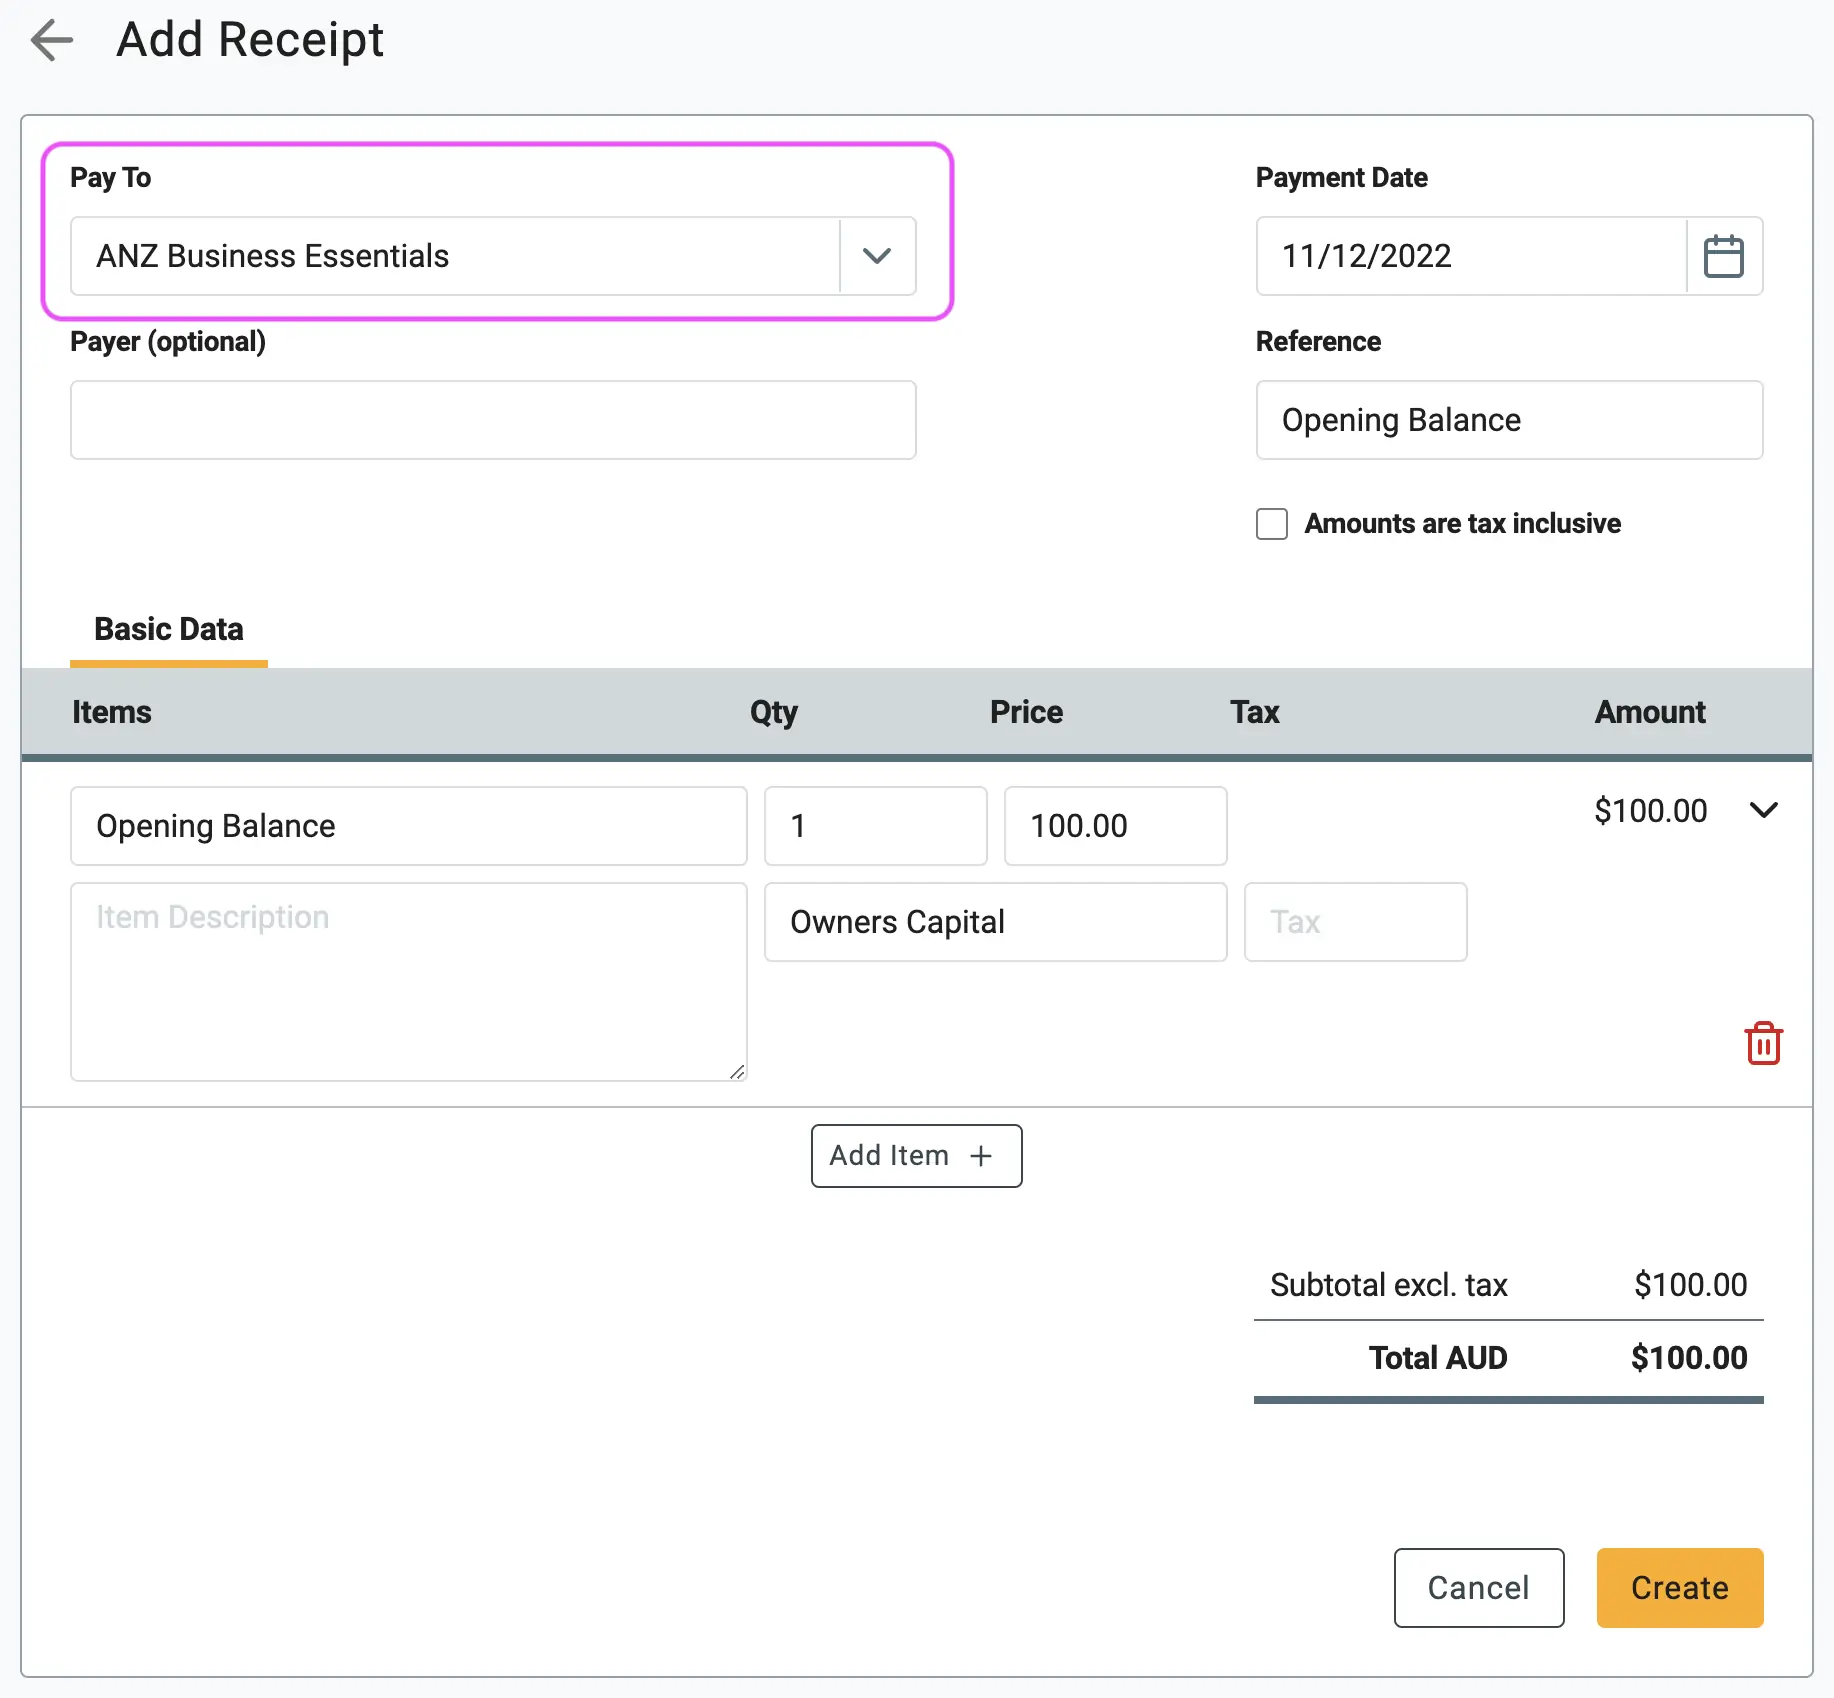
3 Click Create. Your bank balance in the Gimbla system will now reflect the opening amount.

🏁 Manually Reconcile
Once you have created the receipt, your work isn't quite done. You must manually reconcile this opening balance.
Why do you need to do this?
When you create a receipt in the previous step, you are only
updating your internal accounting ledger (your book balance
).
However, accounting software relies on matching your internal books
with your actual, real-world bank statements to ensure everything is
accurate. This is the same control process covered in the bank reconciliations guide.
Because this is a starting balance, this transaction occurred before you connected your automatic bank feeds. The bank feed will not import this initial deposit for you to verify.
By manually reconciling, you are explicitly telling Gimbla: "This transaction has cleared the bank, it is official, and it serves as the foundation for my account." If you skip this step, your opening balance will float in the system as an uncleared, pending transaction, which will throw off all of your future bank reconciliations.
How to Manually Reconcile
1 Navigate to the specific bank account view.
2 Click on the In Gimbla tab. This tab shows transactions you've created in the software that haven't been matched to a bank statement yet.
3 Locate the Opening Balance receipt you just created. Change the date range if you can't find it.
4 Click the dashed circle icon in the Match column on the far right.
5 The icon will change to a green checkmark (✓), indicating the transaction is now reconciled.

After clicking Match,
Gimbla automatically generates a
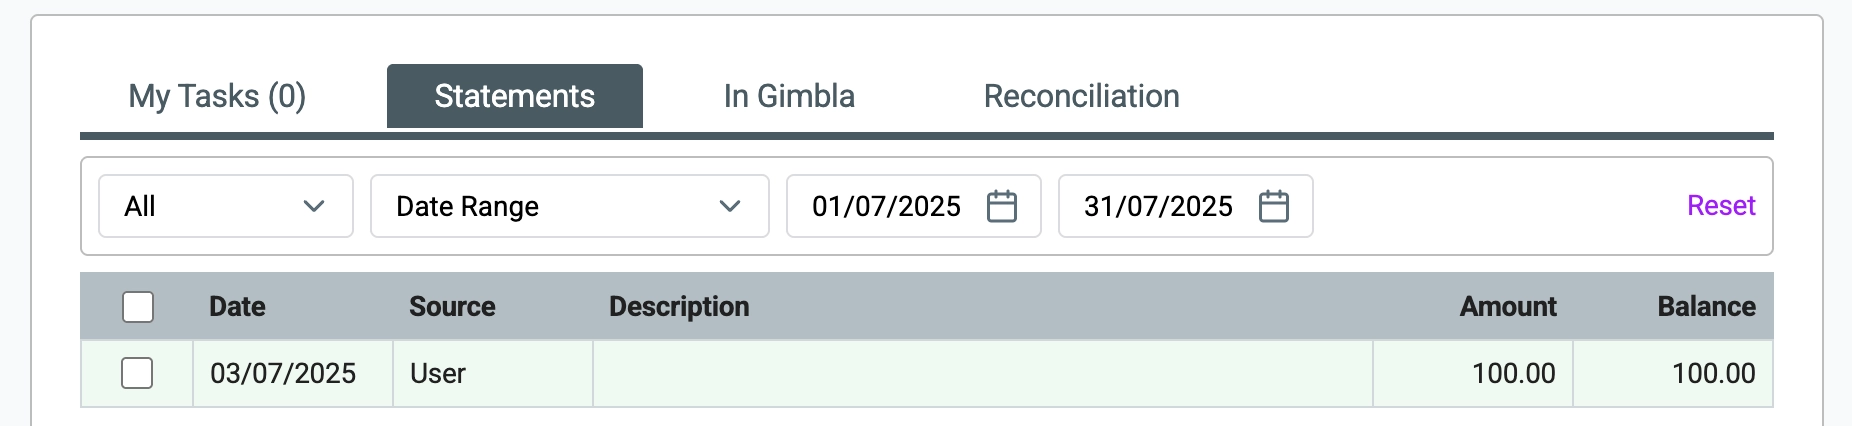
corresponding bank statement entry. If you click over to the
Statements
tab, you will now see this transaction permanently logged
as cleared!
▶️ Video Tutorial
Prefer to watch? Our video guide walks you through the entire process.