Grants and projects
Grant funding can be difficult to track when it is mixed with your organisation's everyday income and expenses. In Gimbla, you can use dedicated grant accounts and a project code to keep a clear record of the funding received, project expenses and grant income recognised.
This guide uses an example where grant funding is initially recorded as a liability and then recognised as income as the related milestones or obligations are completed.
How the process works
- Part A: Record the grant funding received.
- Part B: Record expenses against the grant project.
- Part C: Recognise grant income and prepare project reports.
Before you begin
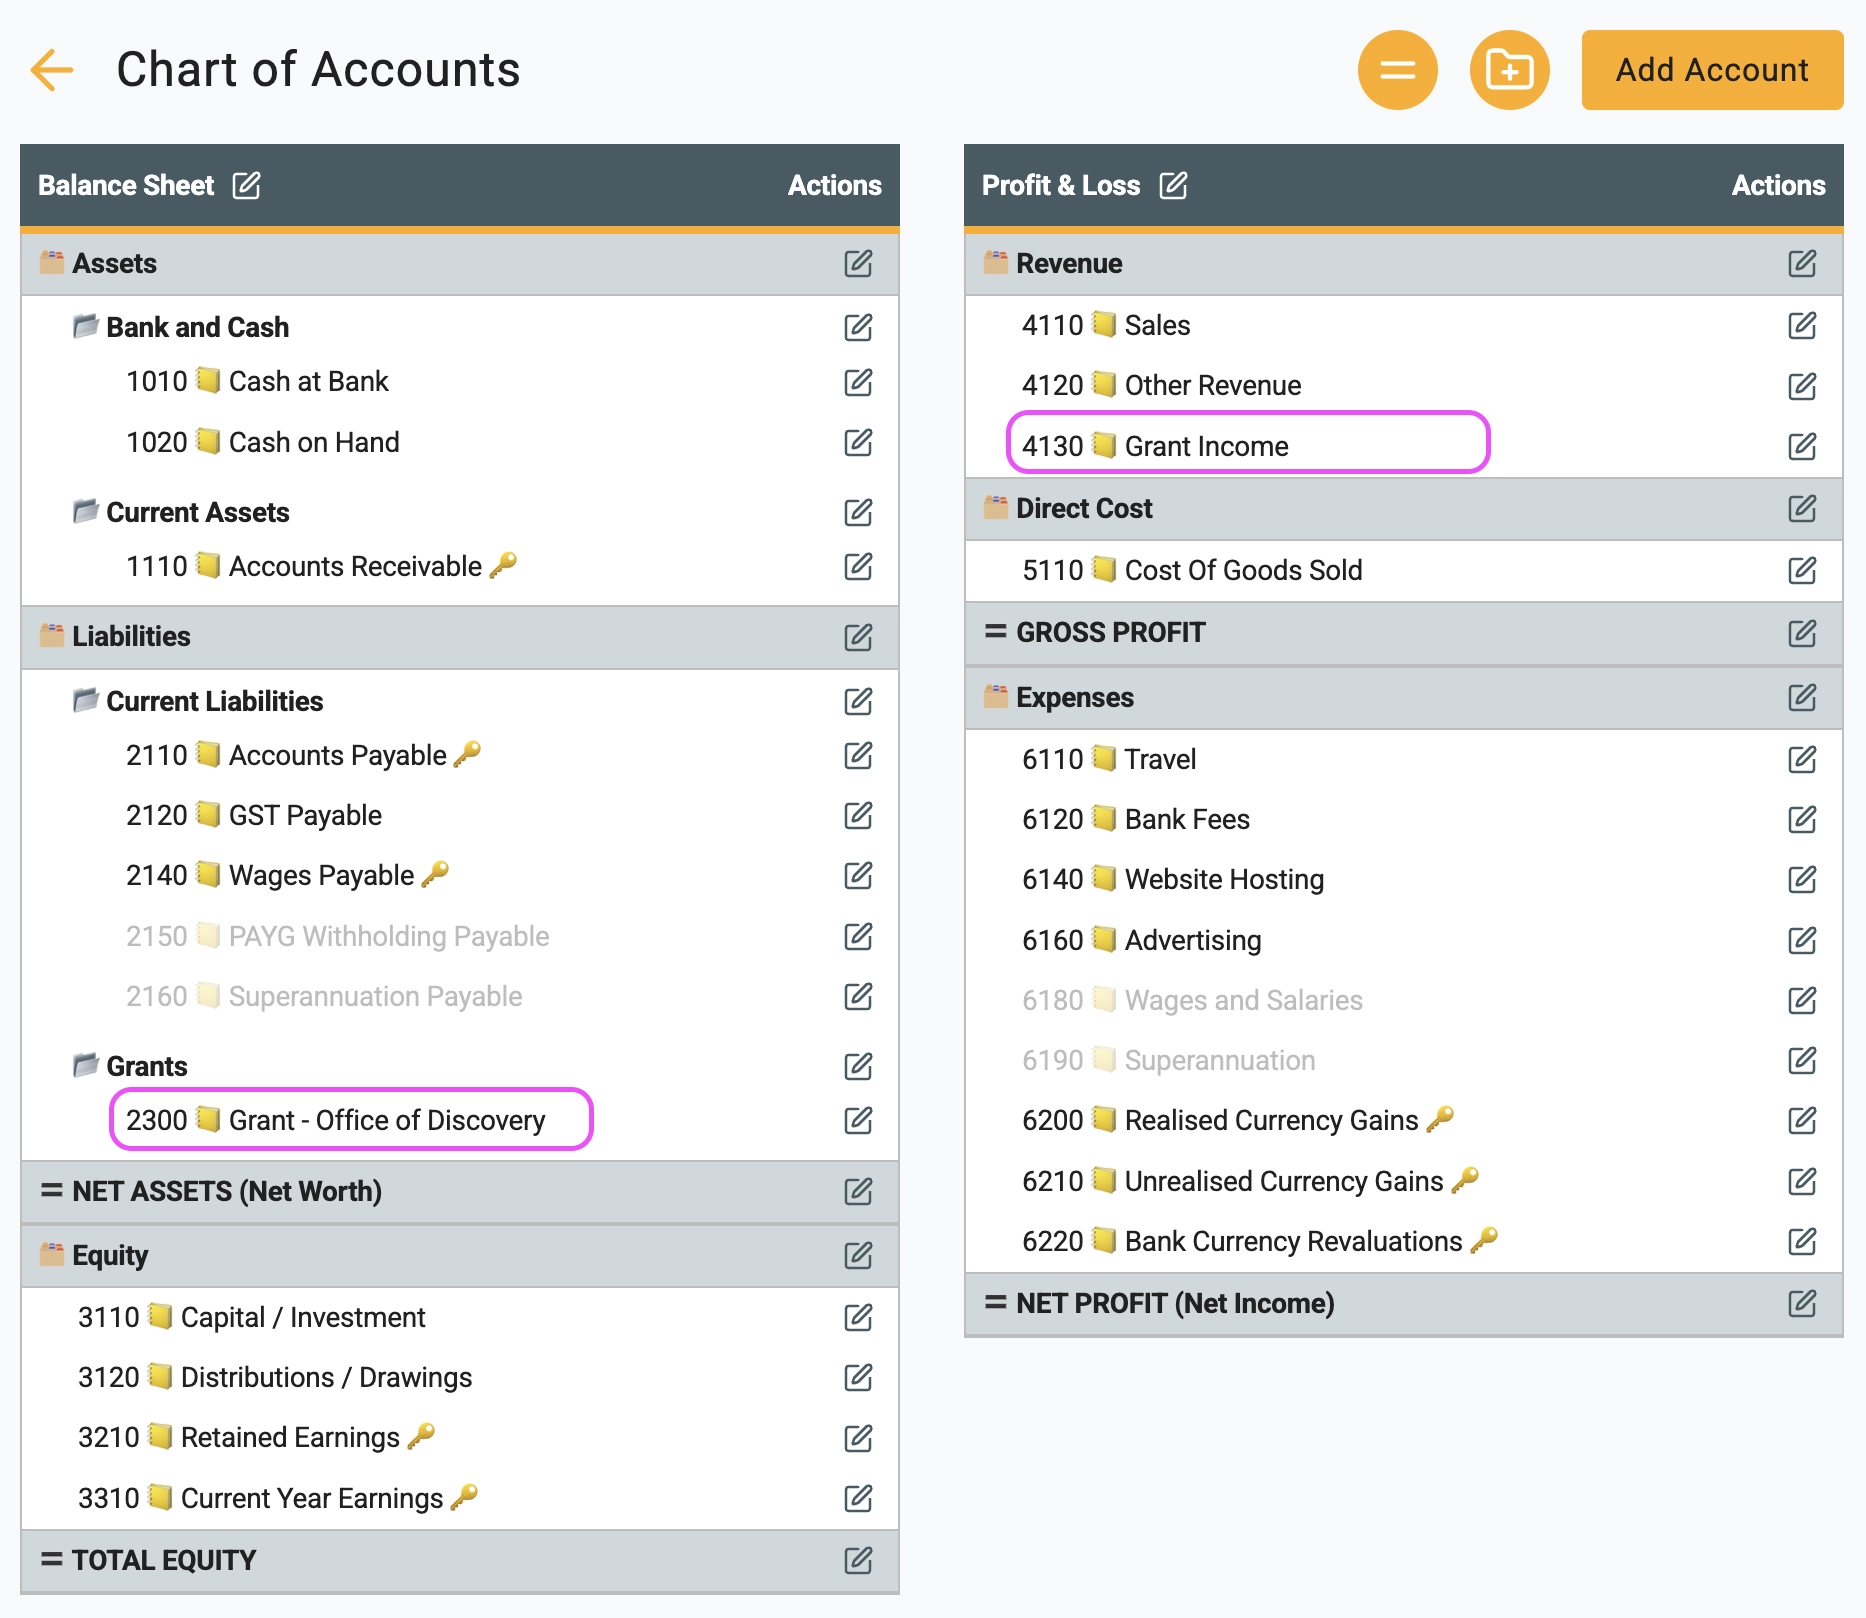
Create the following accounts in Gimbla:
- Grant - Office of Discovery: A balance sheet liability account used to track funding that has not yet been recognised as income.
- Grant Income: An income account used to show recognised grant revenue in your Profit and Loss report.
You will also need a project code for the grant so you can track its income and expenses separately.
Part A – Record the grant funding received
1 Create an invoice for the funding provider
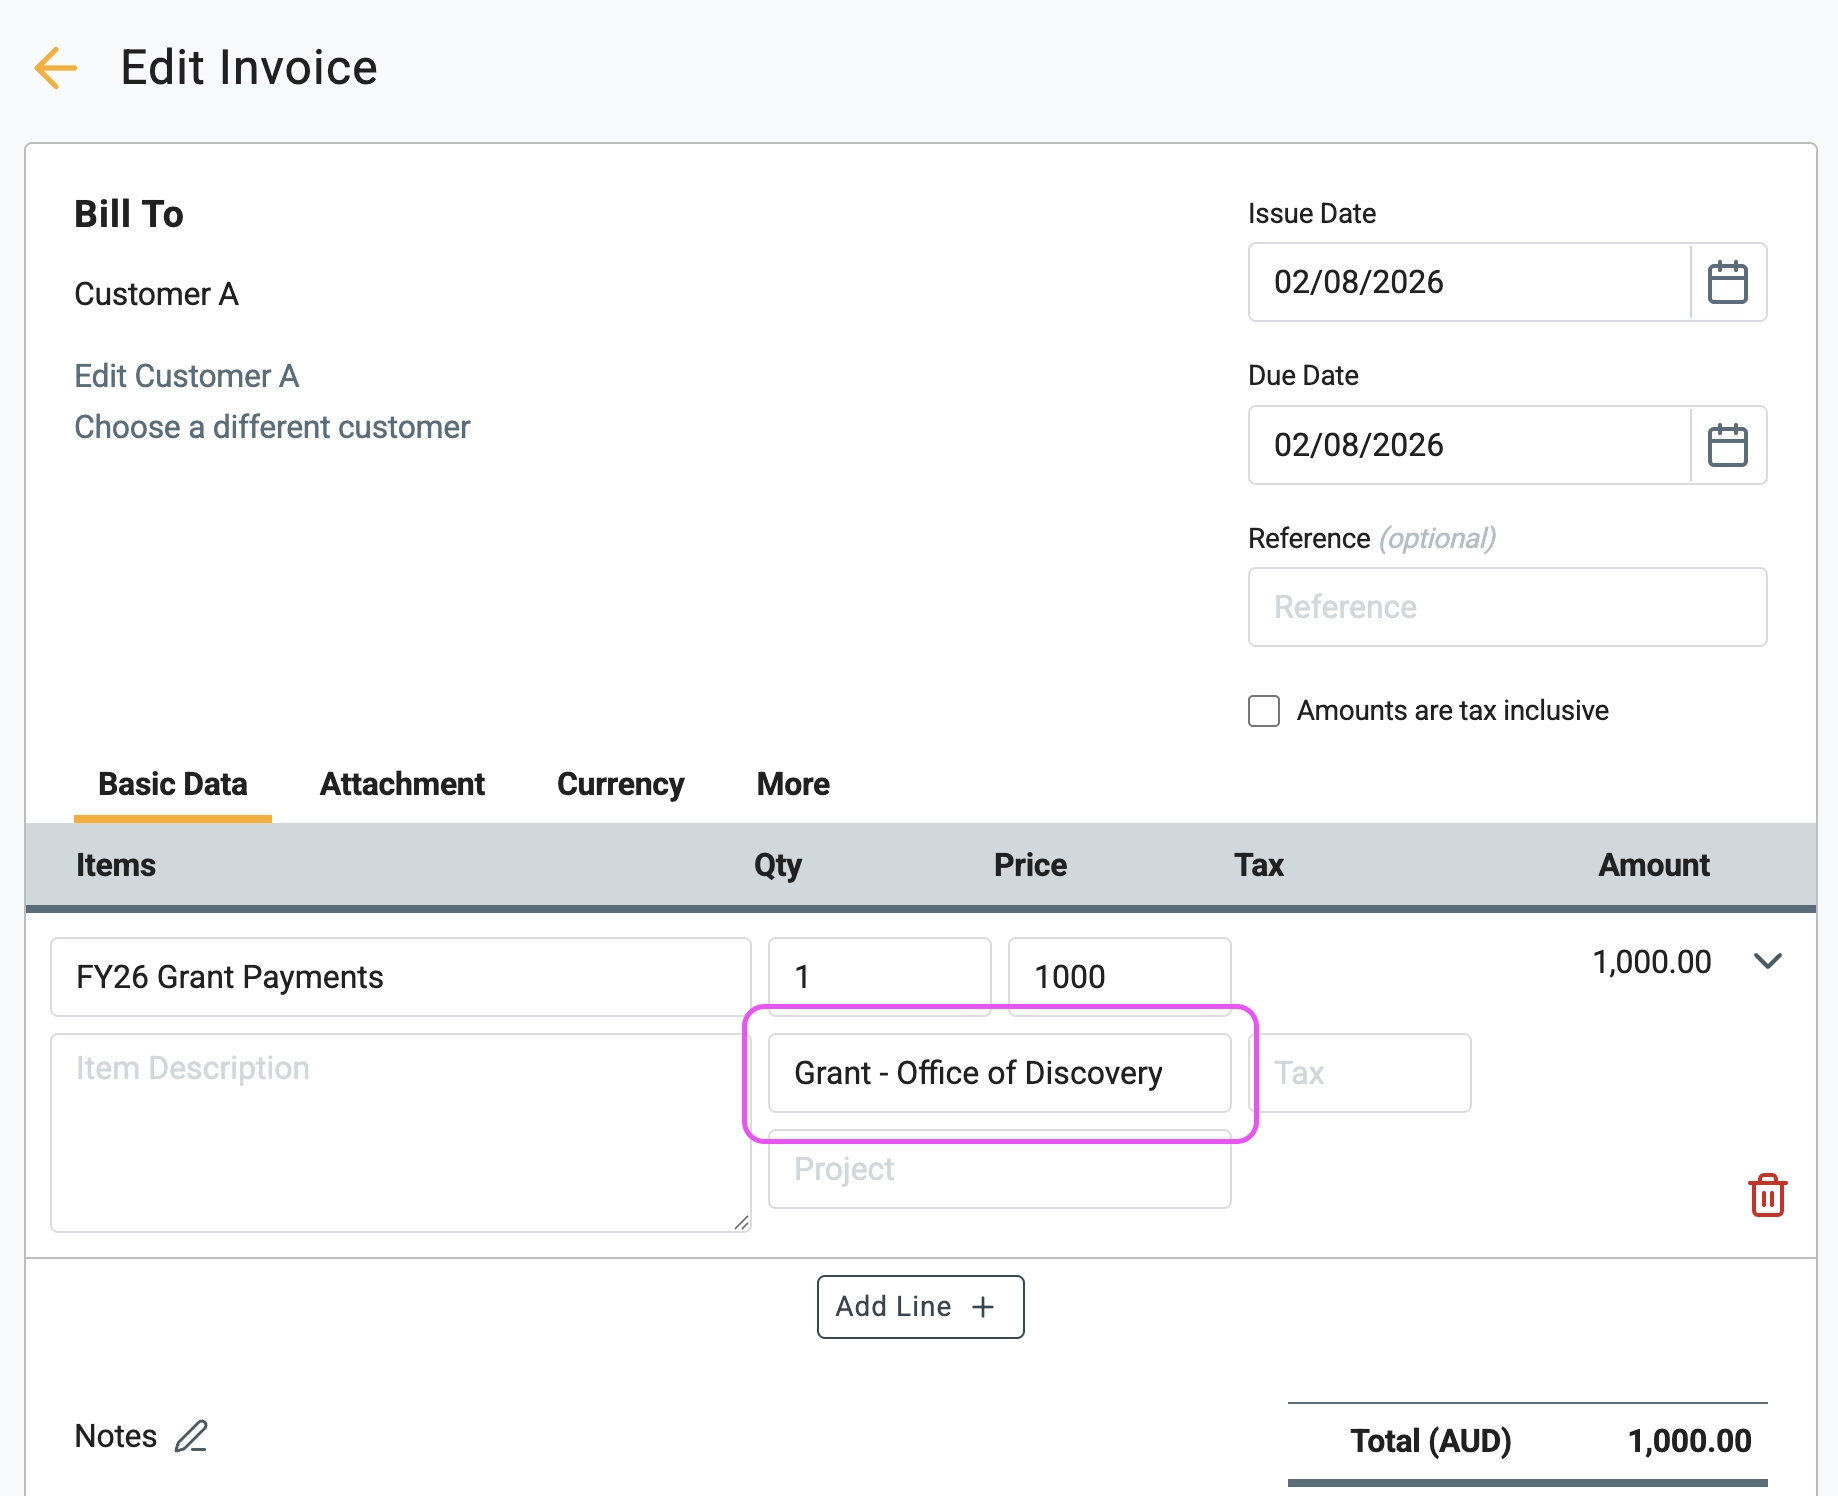
Some funding providers require an invoice before releasing the grant. If an invoice is required, create it as usual and select the grant liability account you created, such as Grant - Office of Discovery.
2 Review the Balance Sheet
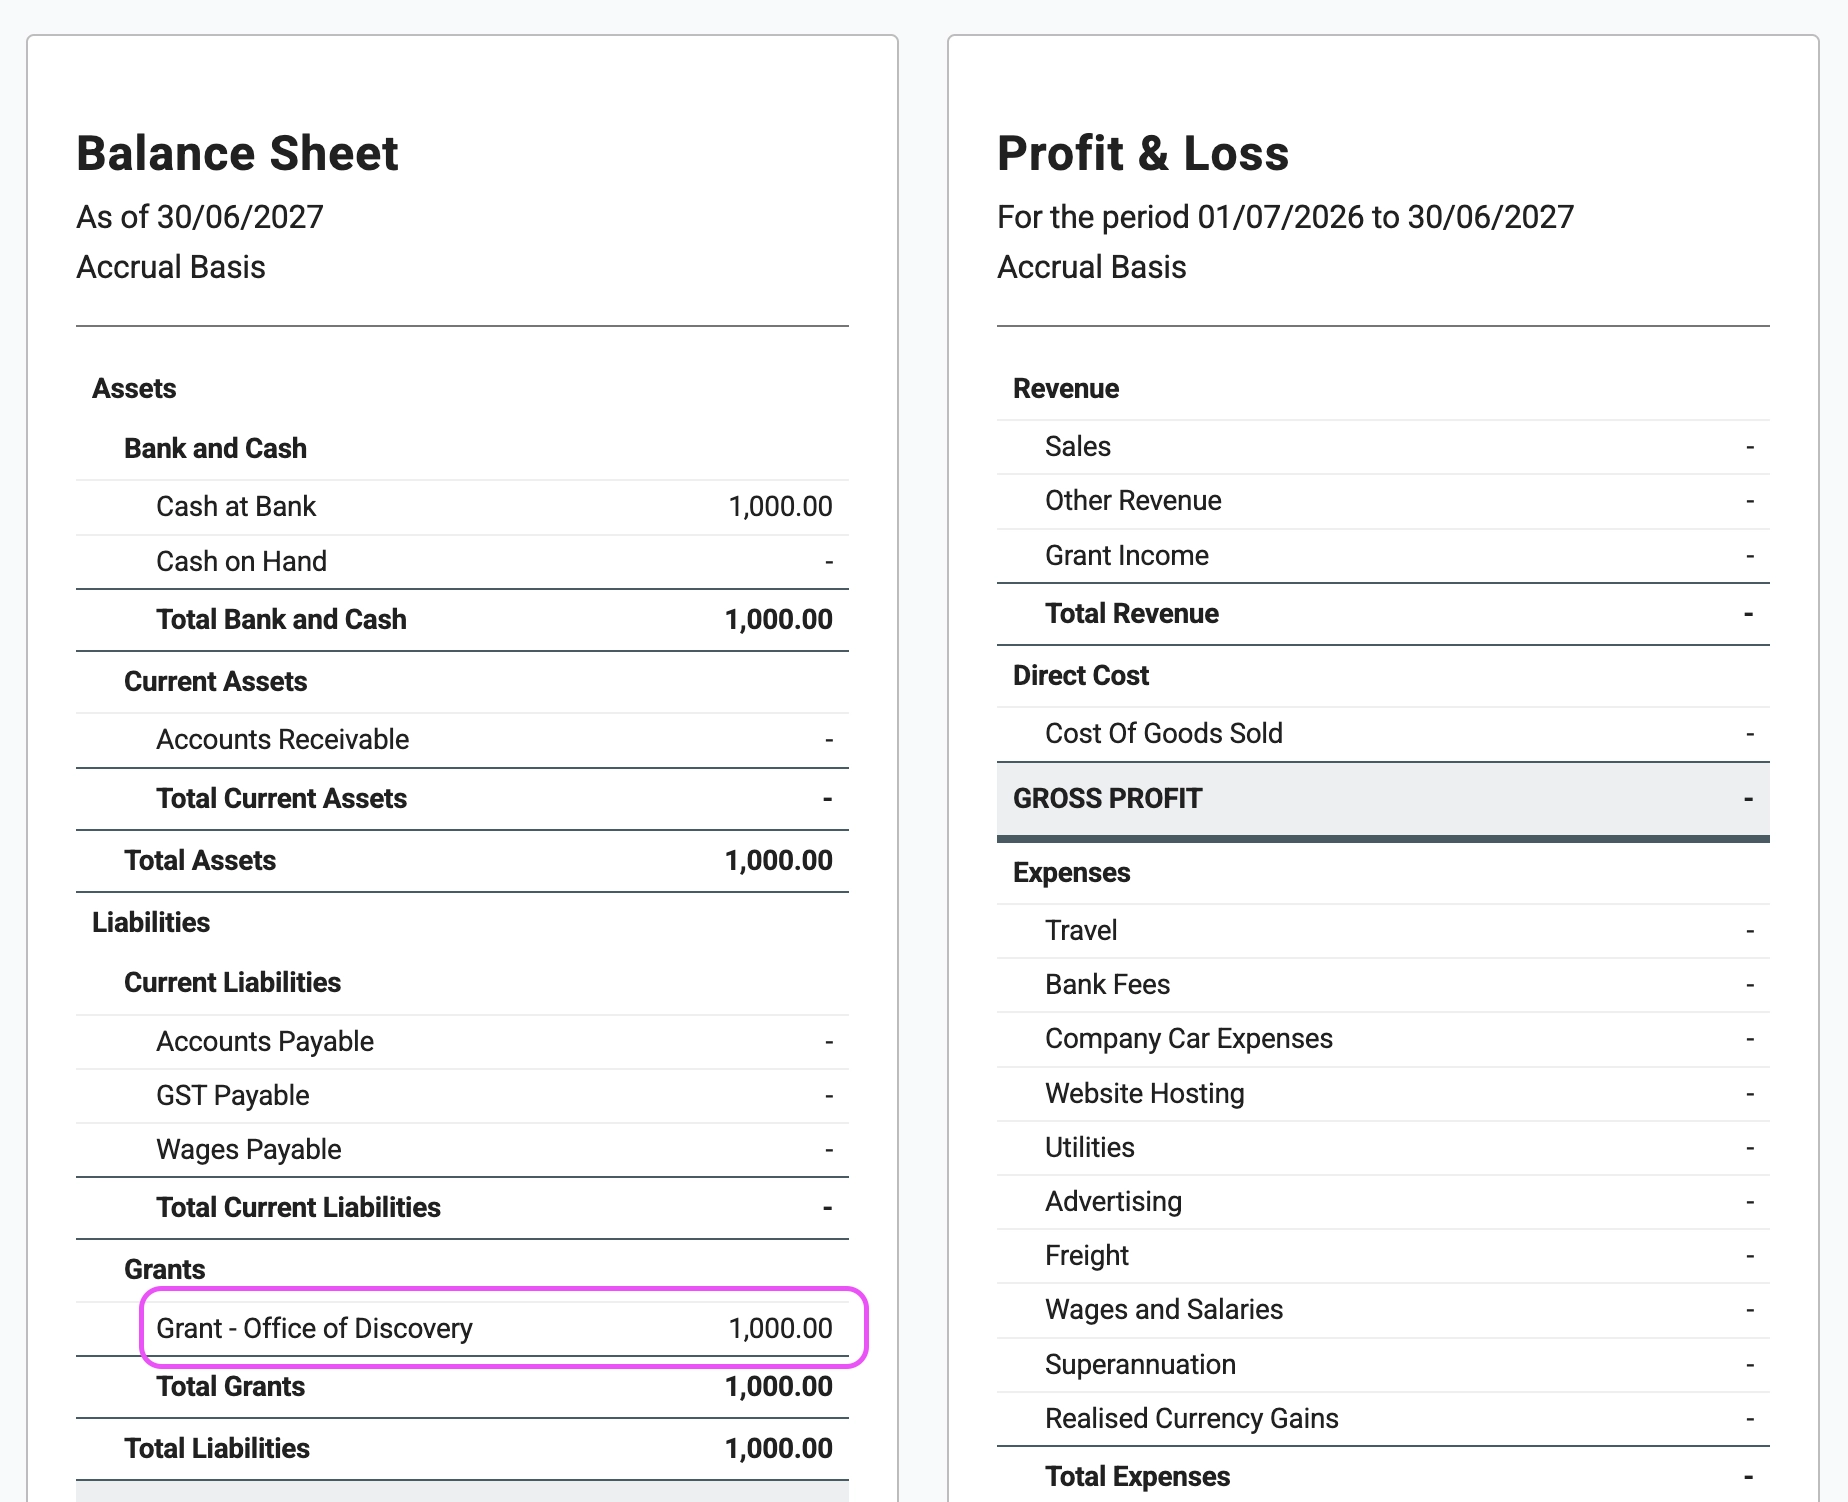
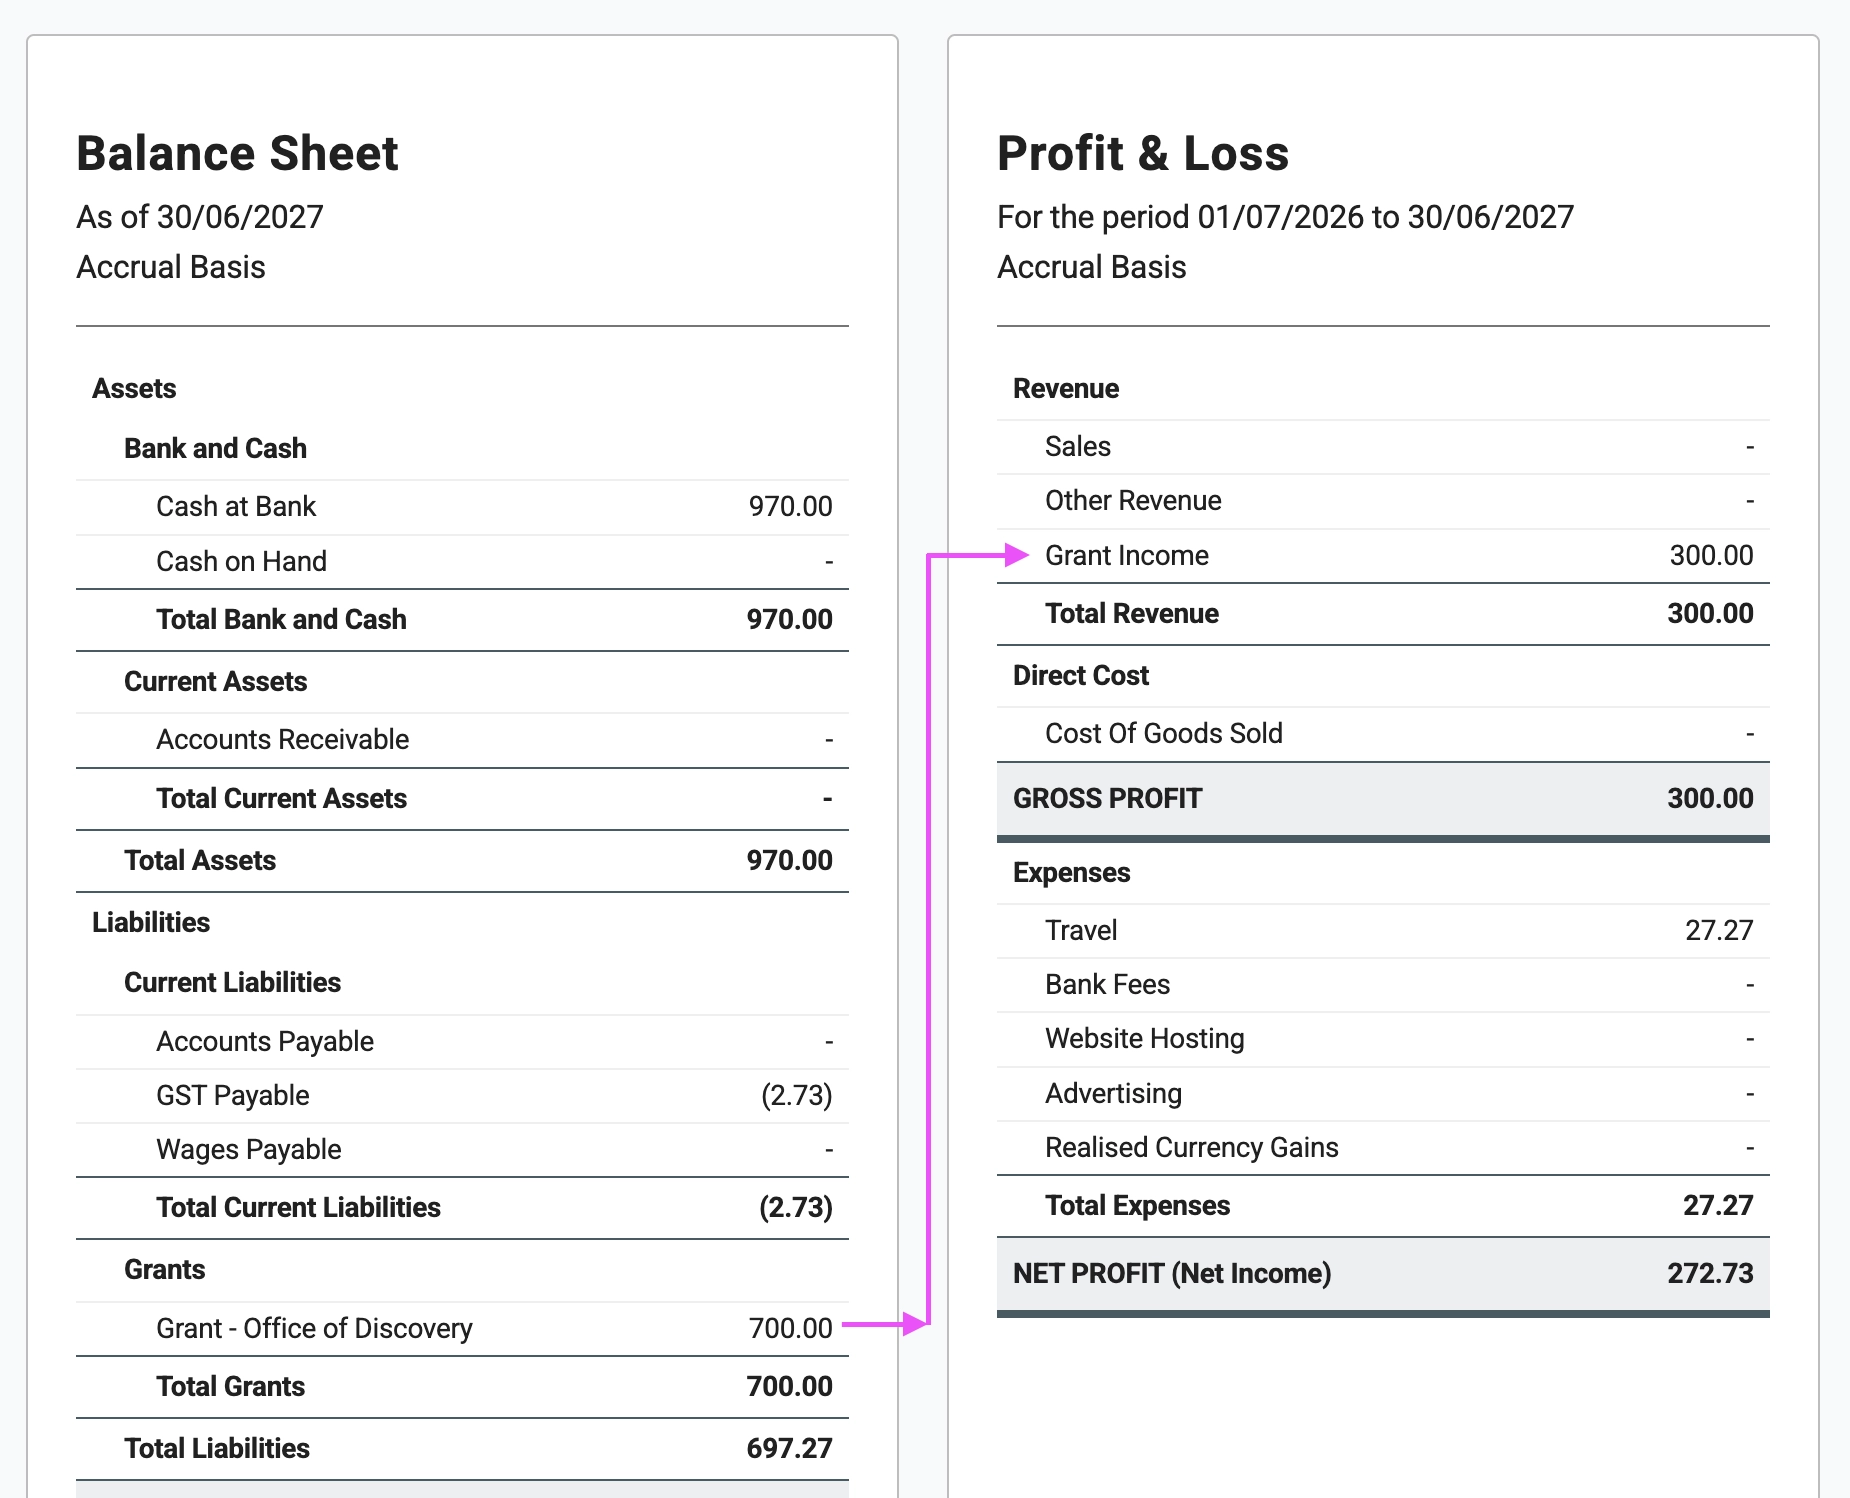
After the payment has been recorded, you should see the money in your bank account and the same amount in the grant liability account.
In this example, the $1,000 liability represents grant funding that has been received but has not yet been recognised as income.
Part B – Record expenses against the grant project
3 Record project expenses
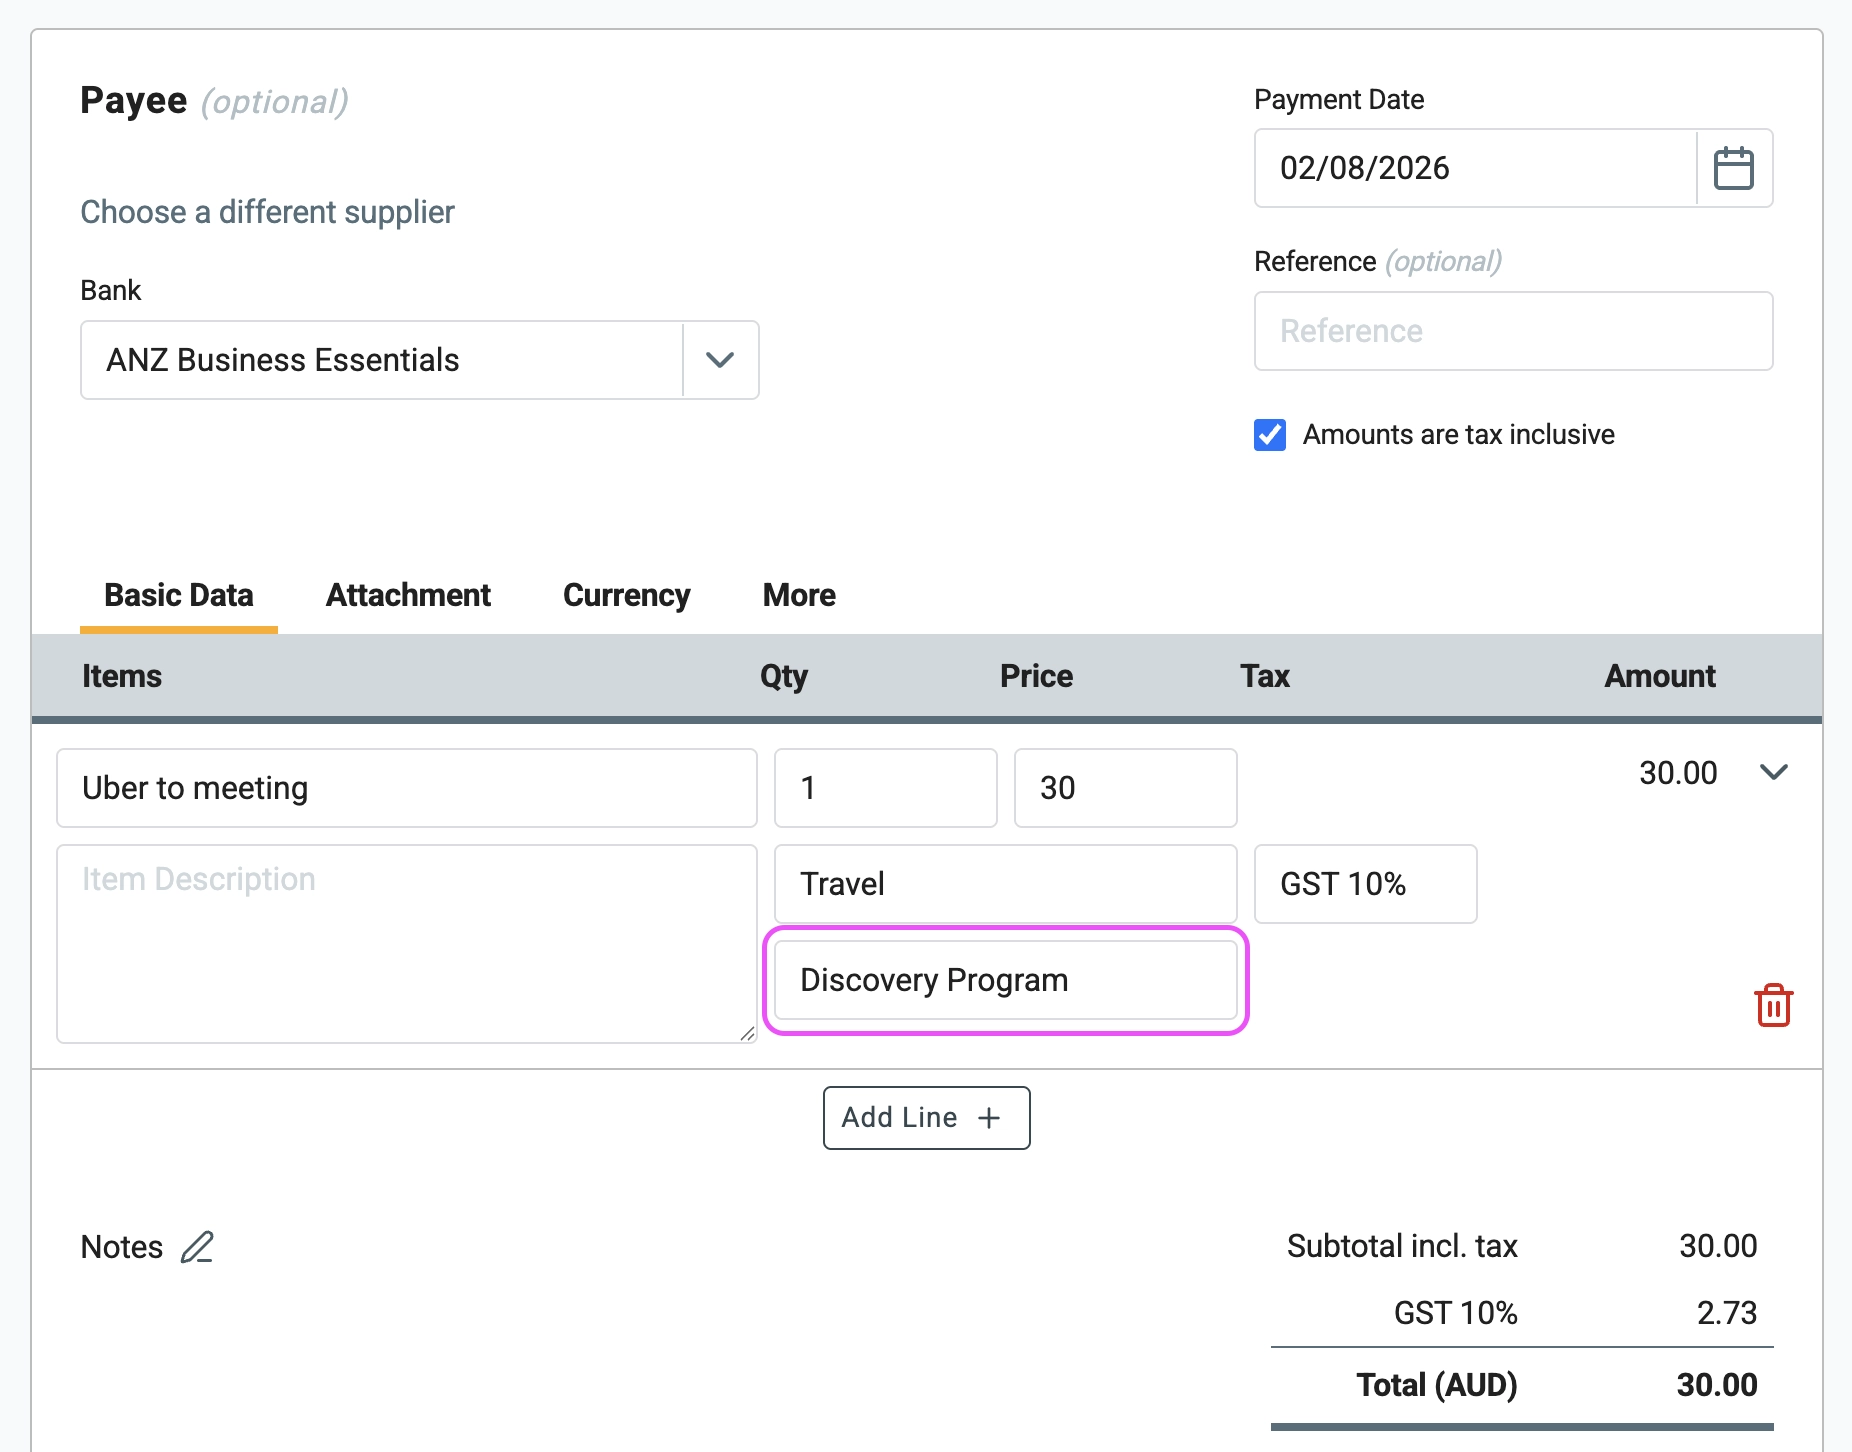
Record bills, payments and other project expenses as you normally would, using the appropriate expense accounts. Select the grant's project code on each relevant transaction.
Adding the project code allows you to filter your reports later and view only the income and expenses associated with the grant.
Part C – Recognise grant income and prepare reports
4 Recognise the grant income
When you reach a milestone or satisfy an obligation under the grant agreement, determine how much of the funding should be recognised as income.
Create a journal entry that:
- Debits the grant liability account
- Credits the grant income account.
This reduces the remaining grant liability on the Balance Sheet and records the amount as income in your Profit and Loss report. Select the same project code on the grant income line so the income is included in your project reports.
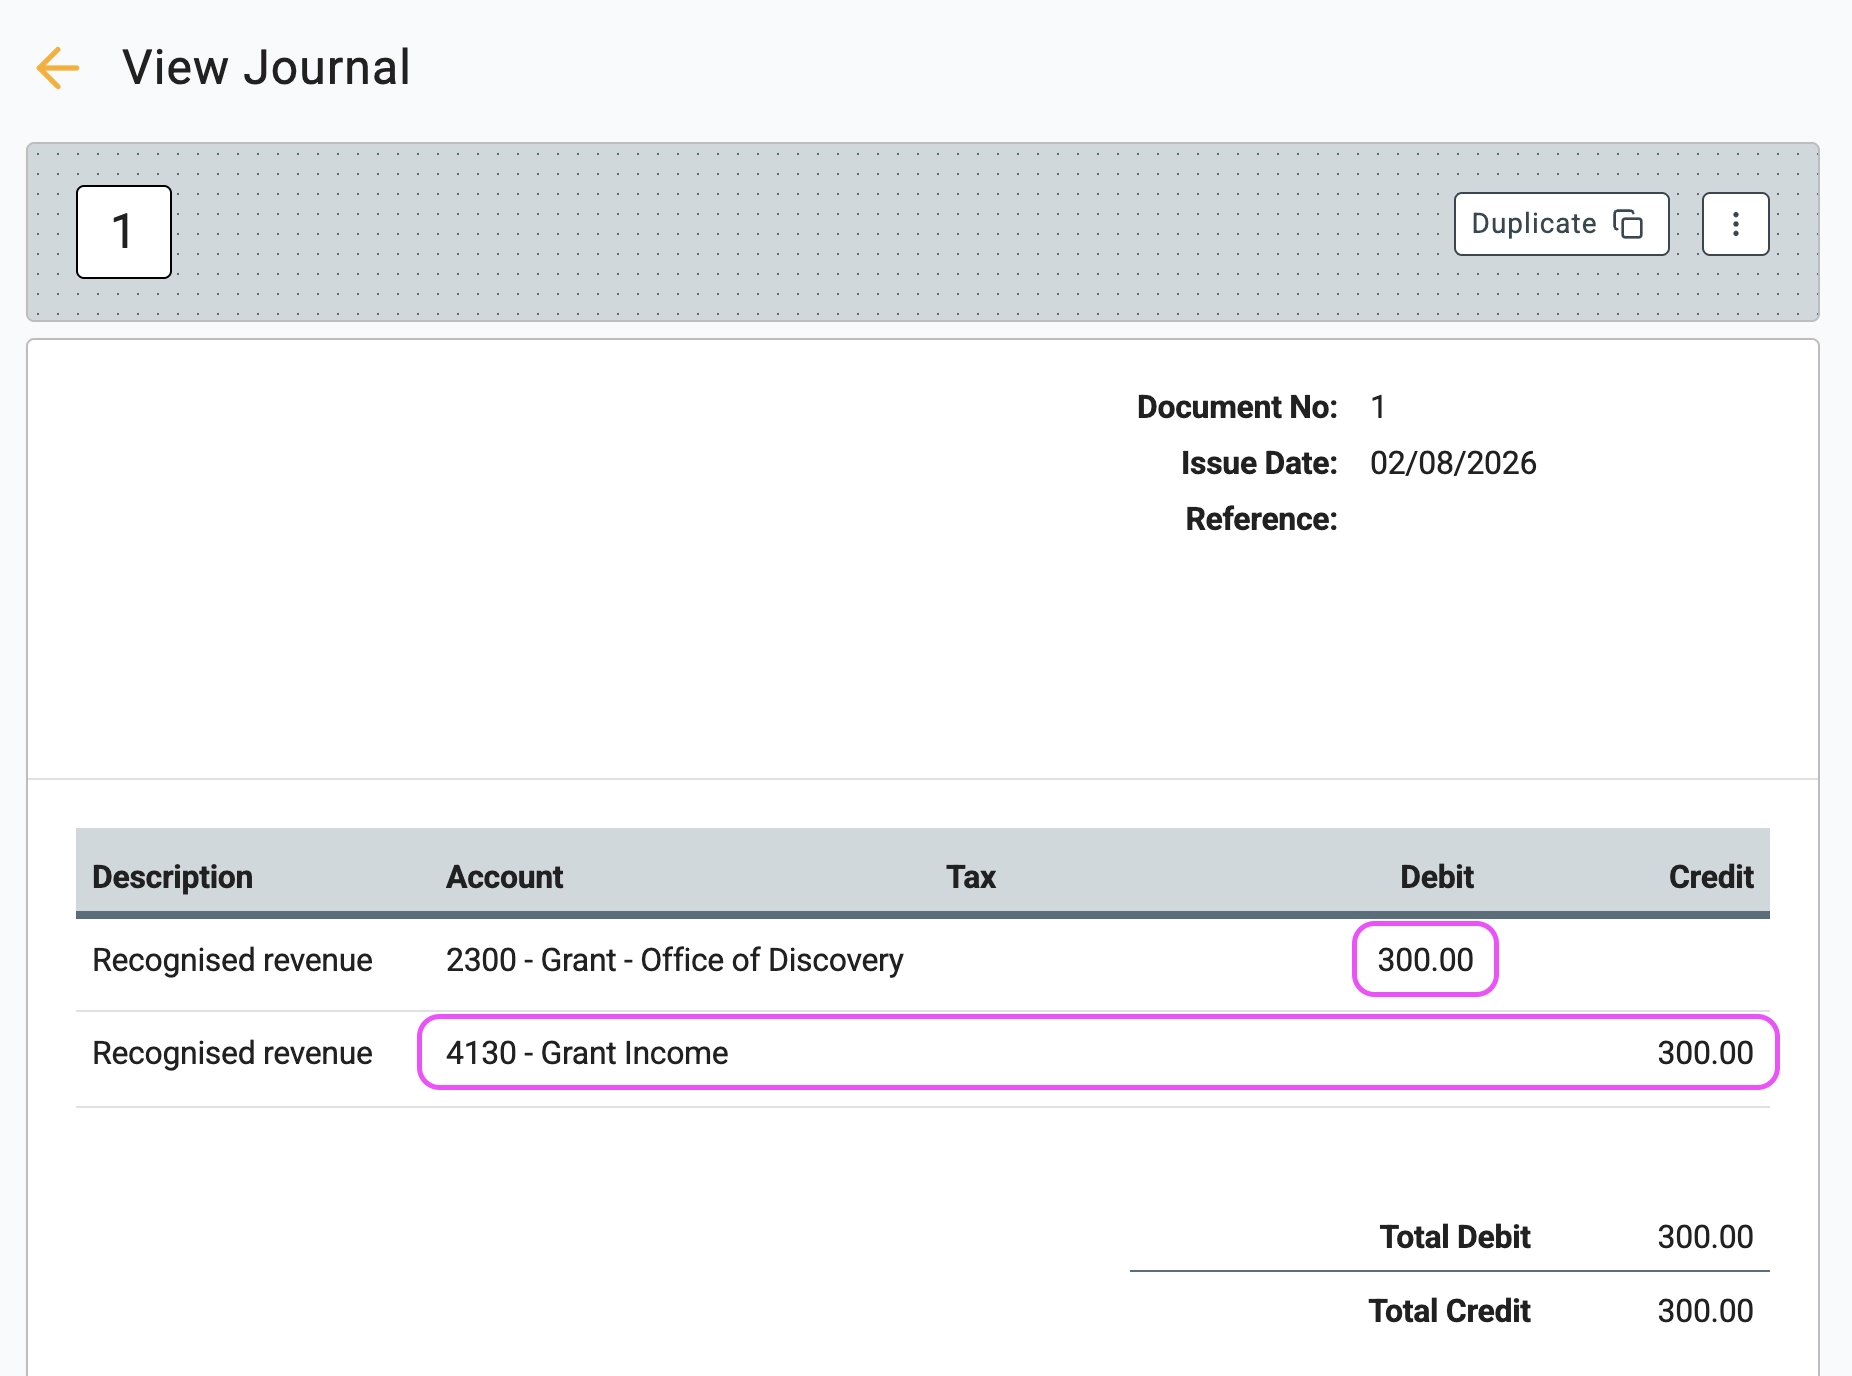
In this example, $300 has been recognised as income. The grant liability has decreased by $300, and the Profit and Loss report now shows $300 of grant income.
5 Prepare the project report
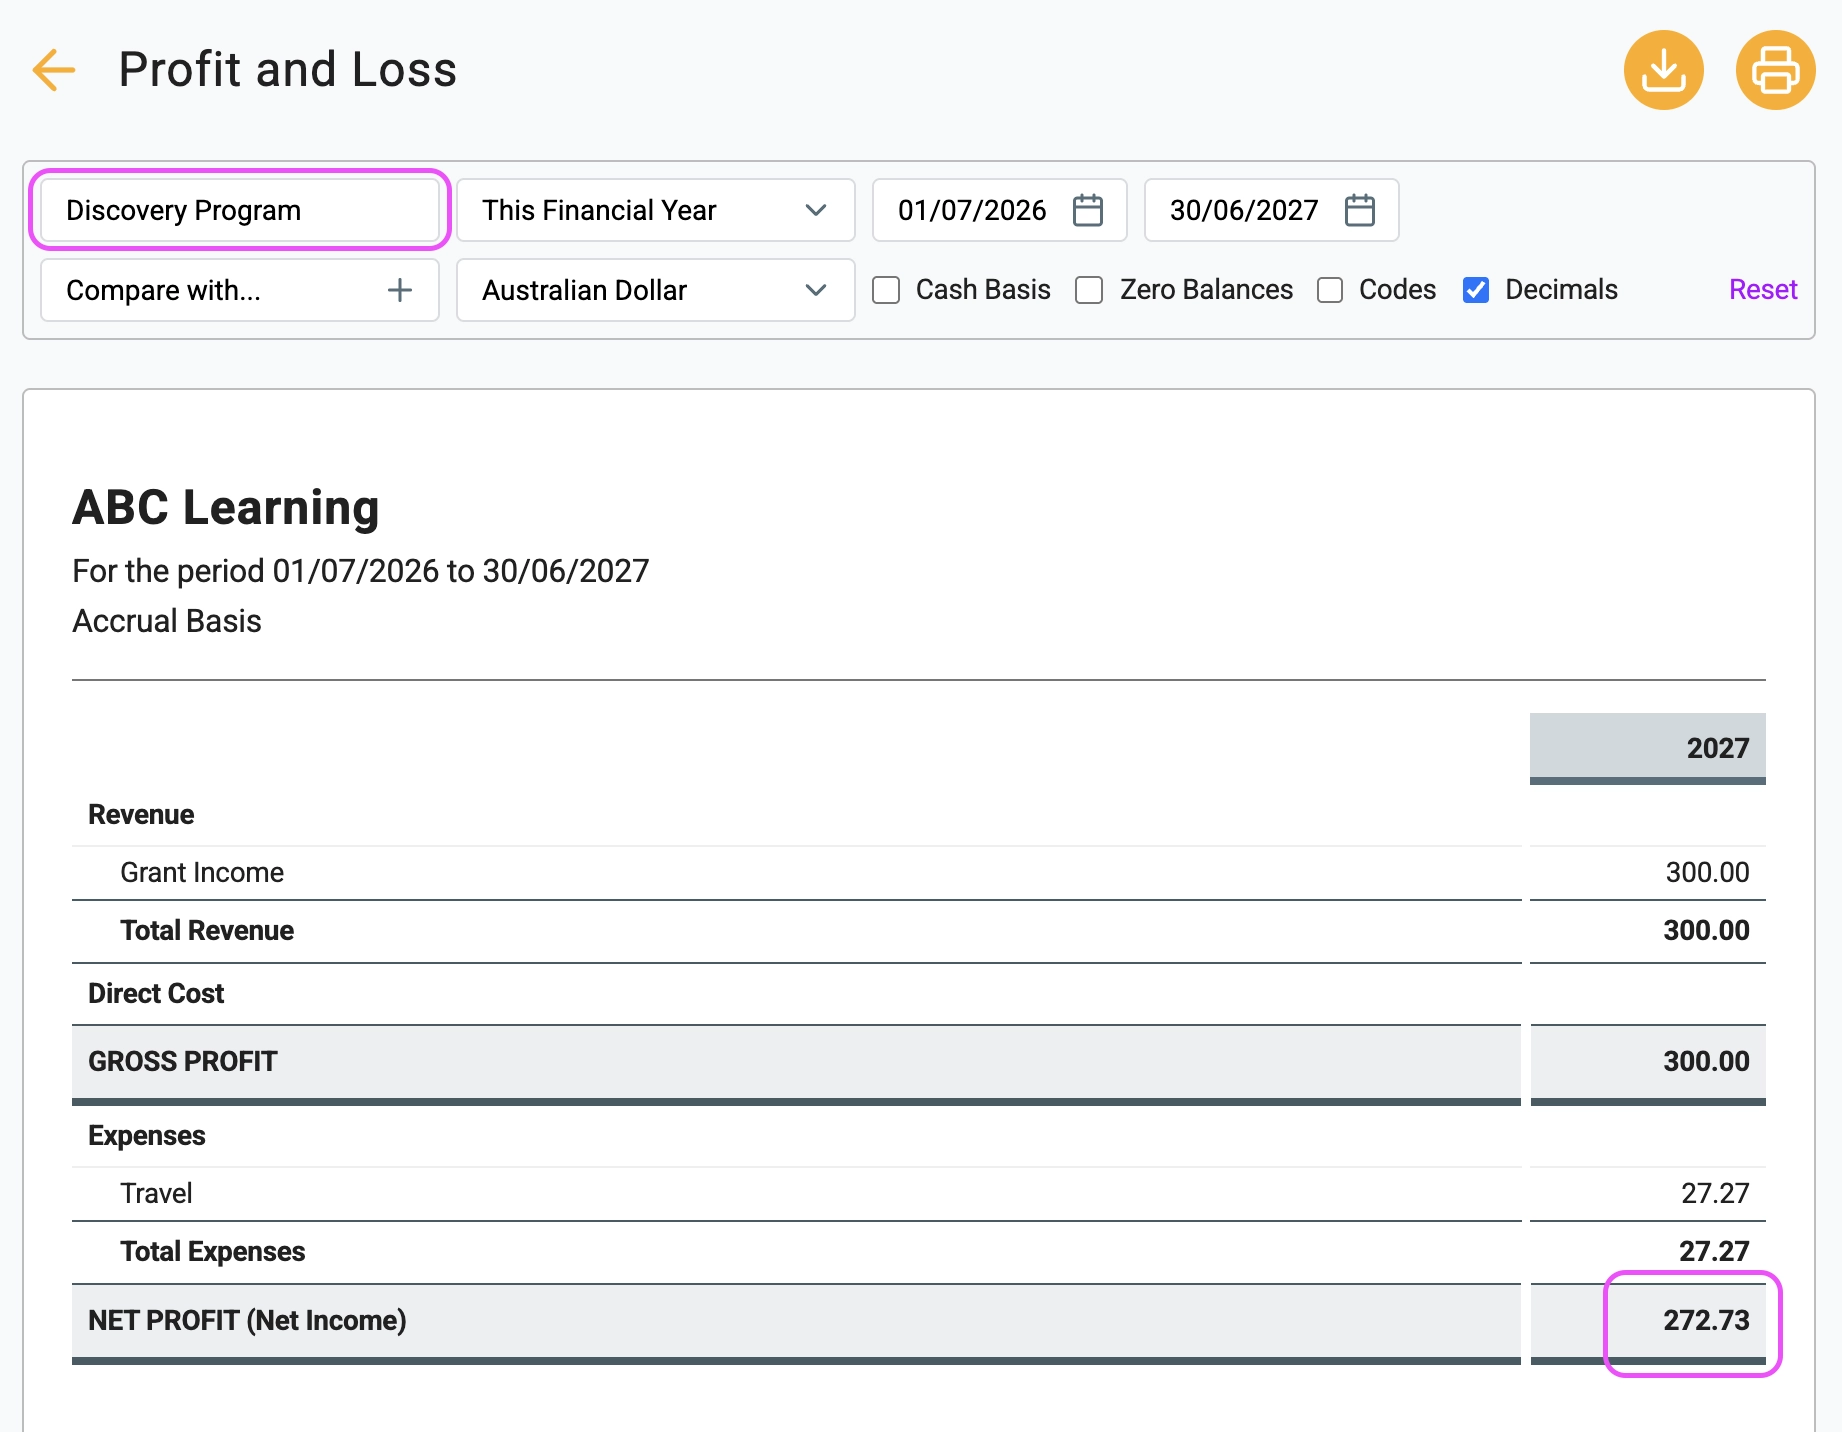
Open the Profit and Loss report and filter it by the grant's project code. The report will show only the income and expenses assigned to that project.
This makes it easier to monitor the grant, compare the funding with project expenses, and prepare reports for grant acquittal or audit purposes.
🏁 Review the remaining grant balance
The balance remaining in the grant liability account should represent the funding that has not yet been recognised as income. Review this balance regularly and reconcile it with the grant agreement and your project records.
Depending on the terms of the grant, unused funding may need to be returned, carried forward or treated in another way. Do not automatically clear the account to zero.