How to Set or Remove a Lock Date
A lock date freezes your past records. It stops anyone from accidentally changing or deleting documents from a closed reporting period.
💡 Need to know
- When to use it: It's best to set a lock date after lodging your BAS or closing out the end of the financial year (EOFY).
- How it works: Once set, nobody can add, edit or delete finalised transactions on or before that date.
🧭 Navigate To
🔒 Set a lock date
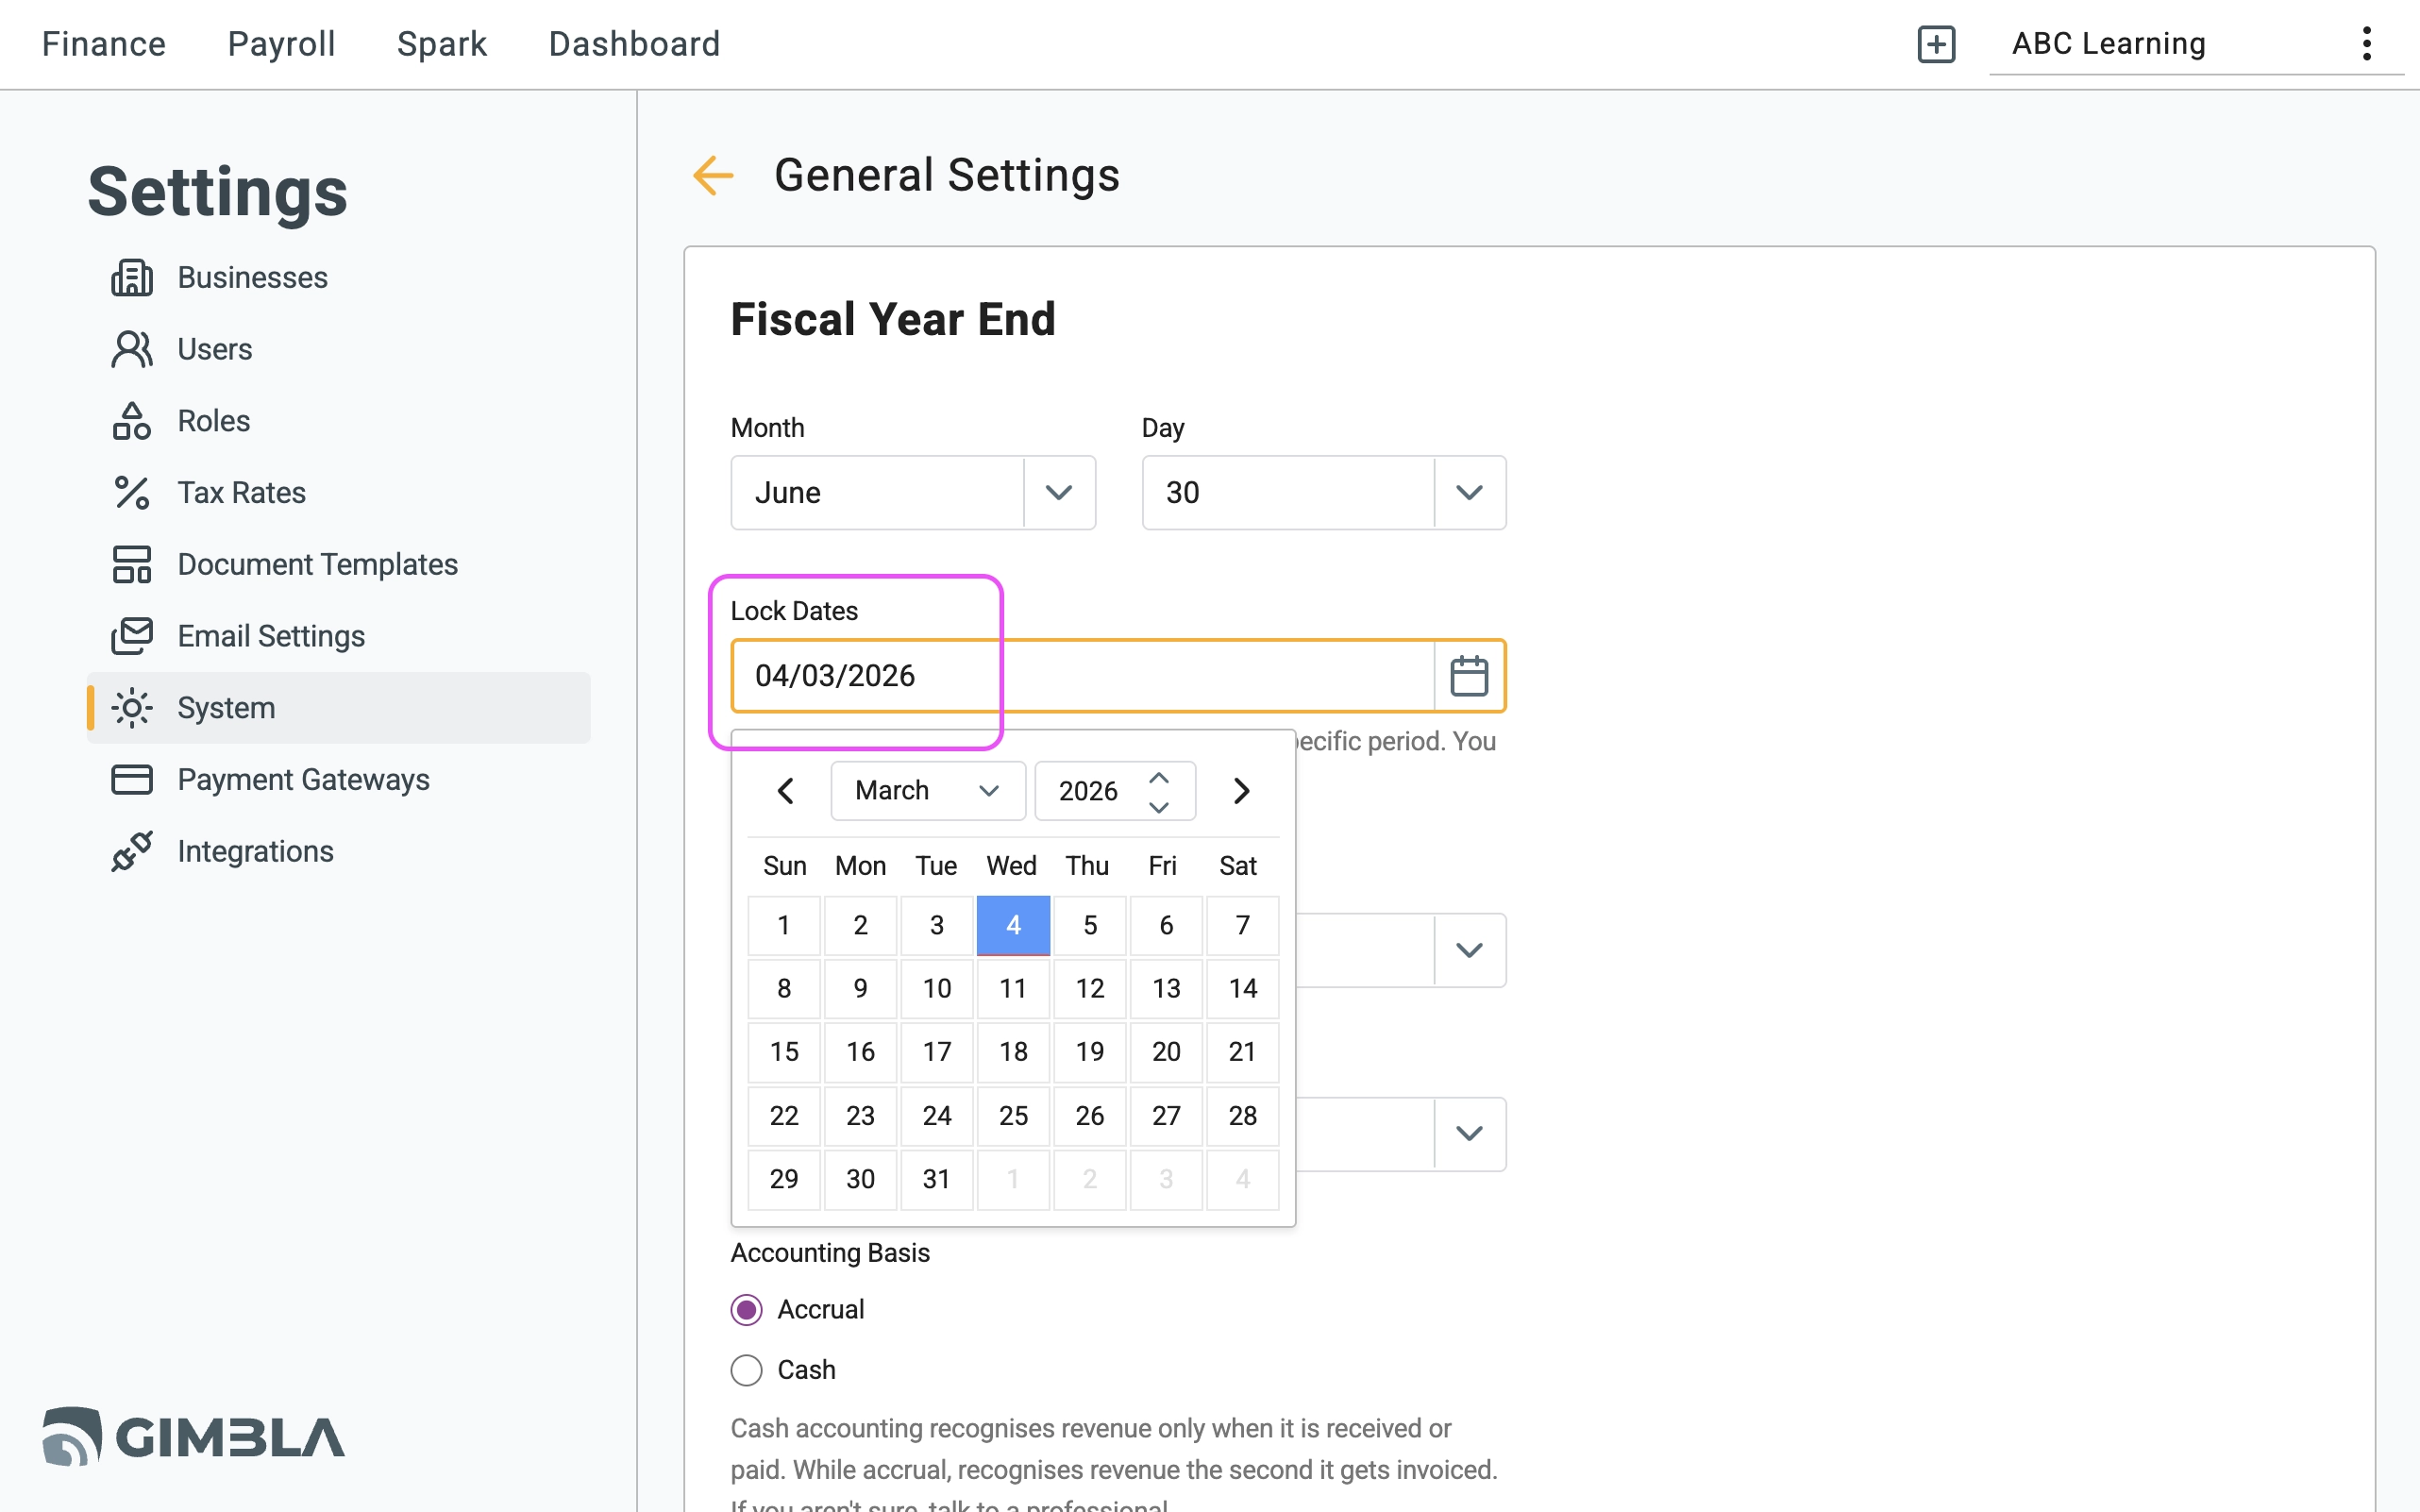
1 Follow the path above to open your General Settings.
2 Click the Lock Dates field to open the calendar dropdown.
3 Pick your date. That's it! Any attempts to change finalised documents before this date will now be blocked.
🔓 Remove or edit a lock date
Need to fix a legitimate mistake in a past period? You can easily lift the lock to make your changes.
1 Go back to the Lock Dates field in your General Settings.
2 To remove the lock entirely, click the field and press the Delete
or Backspace
key until the box is empty.
3 To simply update the lock date, just select a new date from the calendar.