How to Invite and Manage Users
This guide explains how to invite people to access your main Gimbla accounting software. By assigning specific roles, you can collaborate securely with your team, accountant, or bookkeeper.
⚠️ Important: It is essential to understand the difference between a User and an Employee in Gimbla:
- An Employee is set up in the payroll section and only gets access to the staff portal. Their access is limited to submitting timesheets, leaves and expense claims.
- A User, as described in this guide, is given access to your core accounting software to help manage your business finances.
🧭 Navigate To
👣 Walkthrough
1 The first thing we want to do is navigate to the Users screen
and click the Invite A User
button. On the invitation form, enter
the First Name, Last Name, and Email Address for the person you are inviting.
2 Next, choose the User Role. This is the most important step, as assigning the correct role ensures your business data stays secure. Click the dropdown menu to select the level of access (e.g., Administrator, Standard).
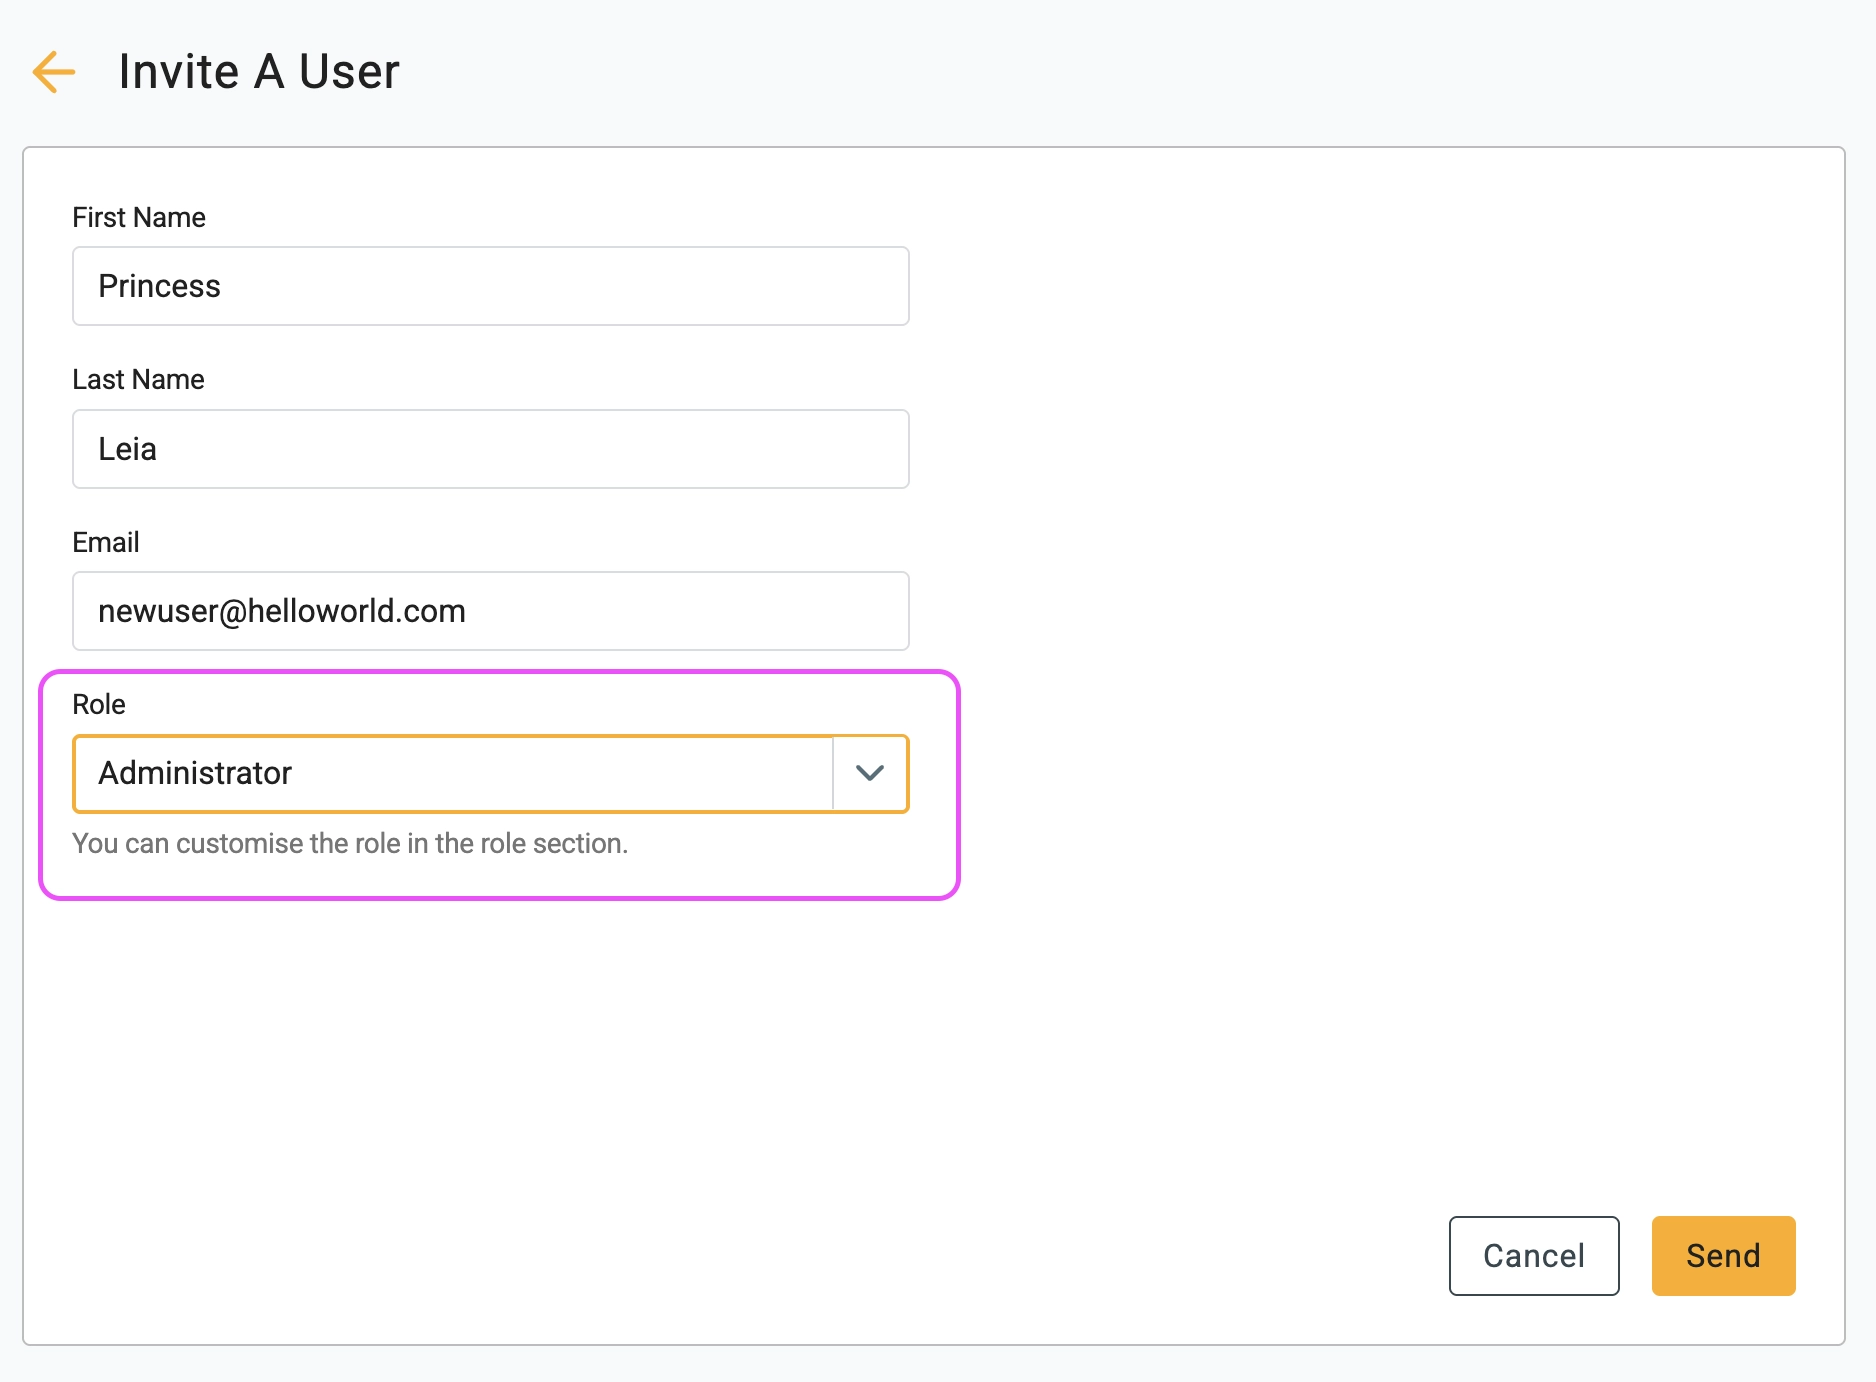
3 Once you have filled in the details and selected a role, click the Send button. An email invitation with a setup link will be sent to the user immediately.
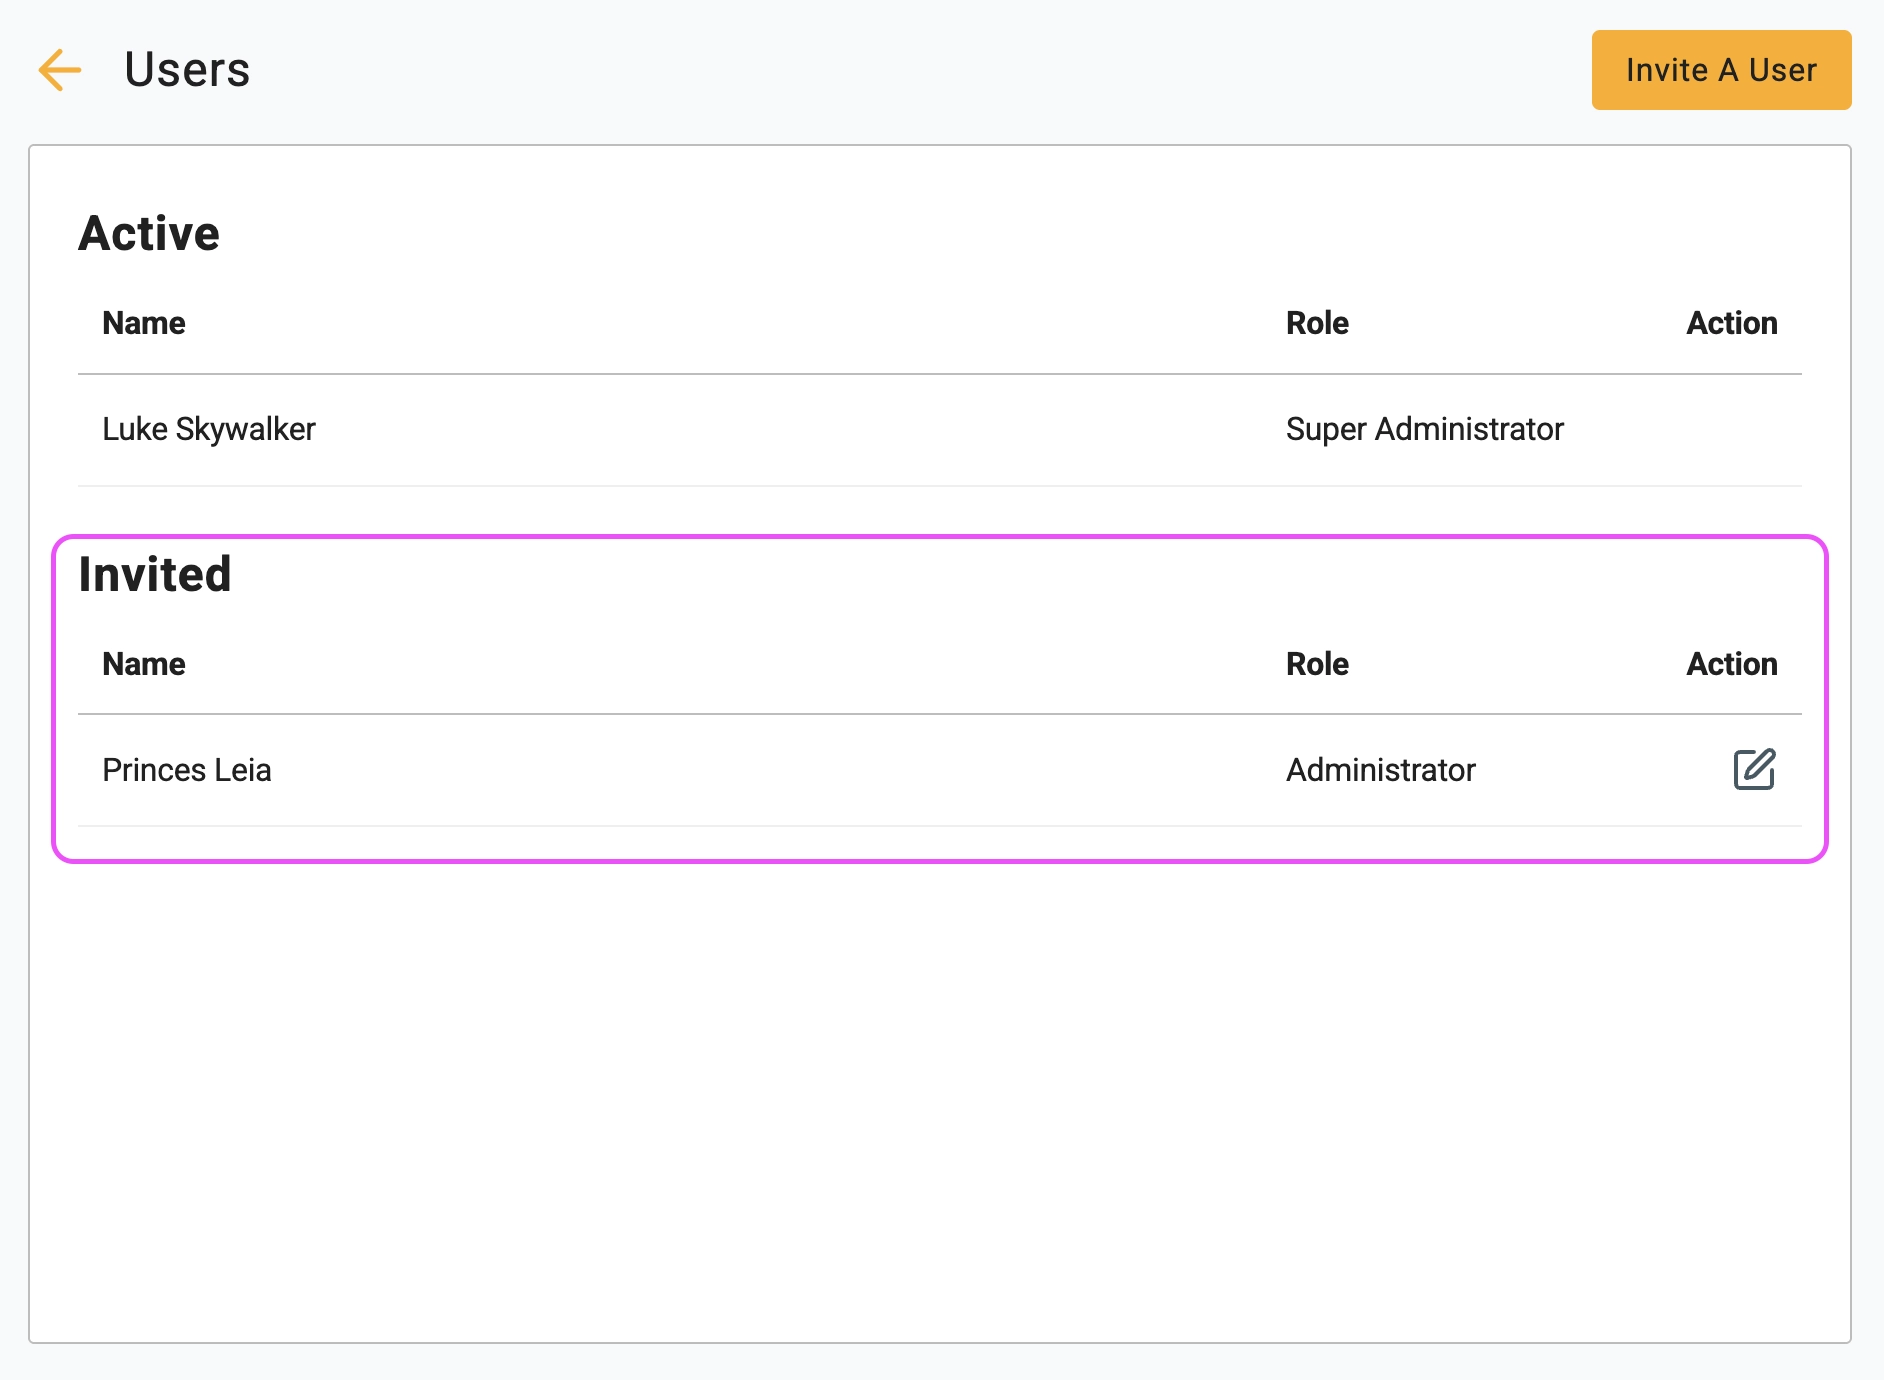
4 After sending, the user will appear in the Invited list on the Users screen. Once they accept the invitation and set up their account, they will automatically move to the Active list.
🖇️ Notes
Take a minute to review the specific permission levels and management options available to you. A brief description of the roles and behaviors follows:
- Super Administrator – The account owner. Has full control, including billing and ownership transfer. There can be only one Super Admin per account.
- Administrator – Recommended for accountants or bookkeepers. Can add, edit, and delete most data but cannot manage subscriptions or invite other users.
- Standard – Ideal for most team members. Can add and edit data but cannot delete records.
- View Only – Has read-only permission across the system. Perfect for users who need to view reports but not make changes.
- Managing Invites
– For security, invitation links expire after 24 hours. If a user does
not accept in time, you can resend the invite by clicking the edit
icon (✎) next to their name in the
Invited
list.