Employee Rostering
A roster helps you schedule your employees' work hours. You can assign them to specific shifts and days. This ensures you have enough staff coverage for your business needs.
🧭 Navigation Menu
🏷️ Example: Let's Schedule an Employee
We'll create a sample roster for one employee. We'll cover publishing it so they can see it, plus some time-saving shortcuts for building future rosters by duplicating shifts.
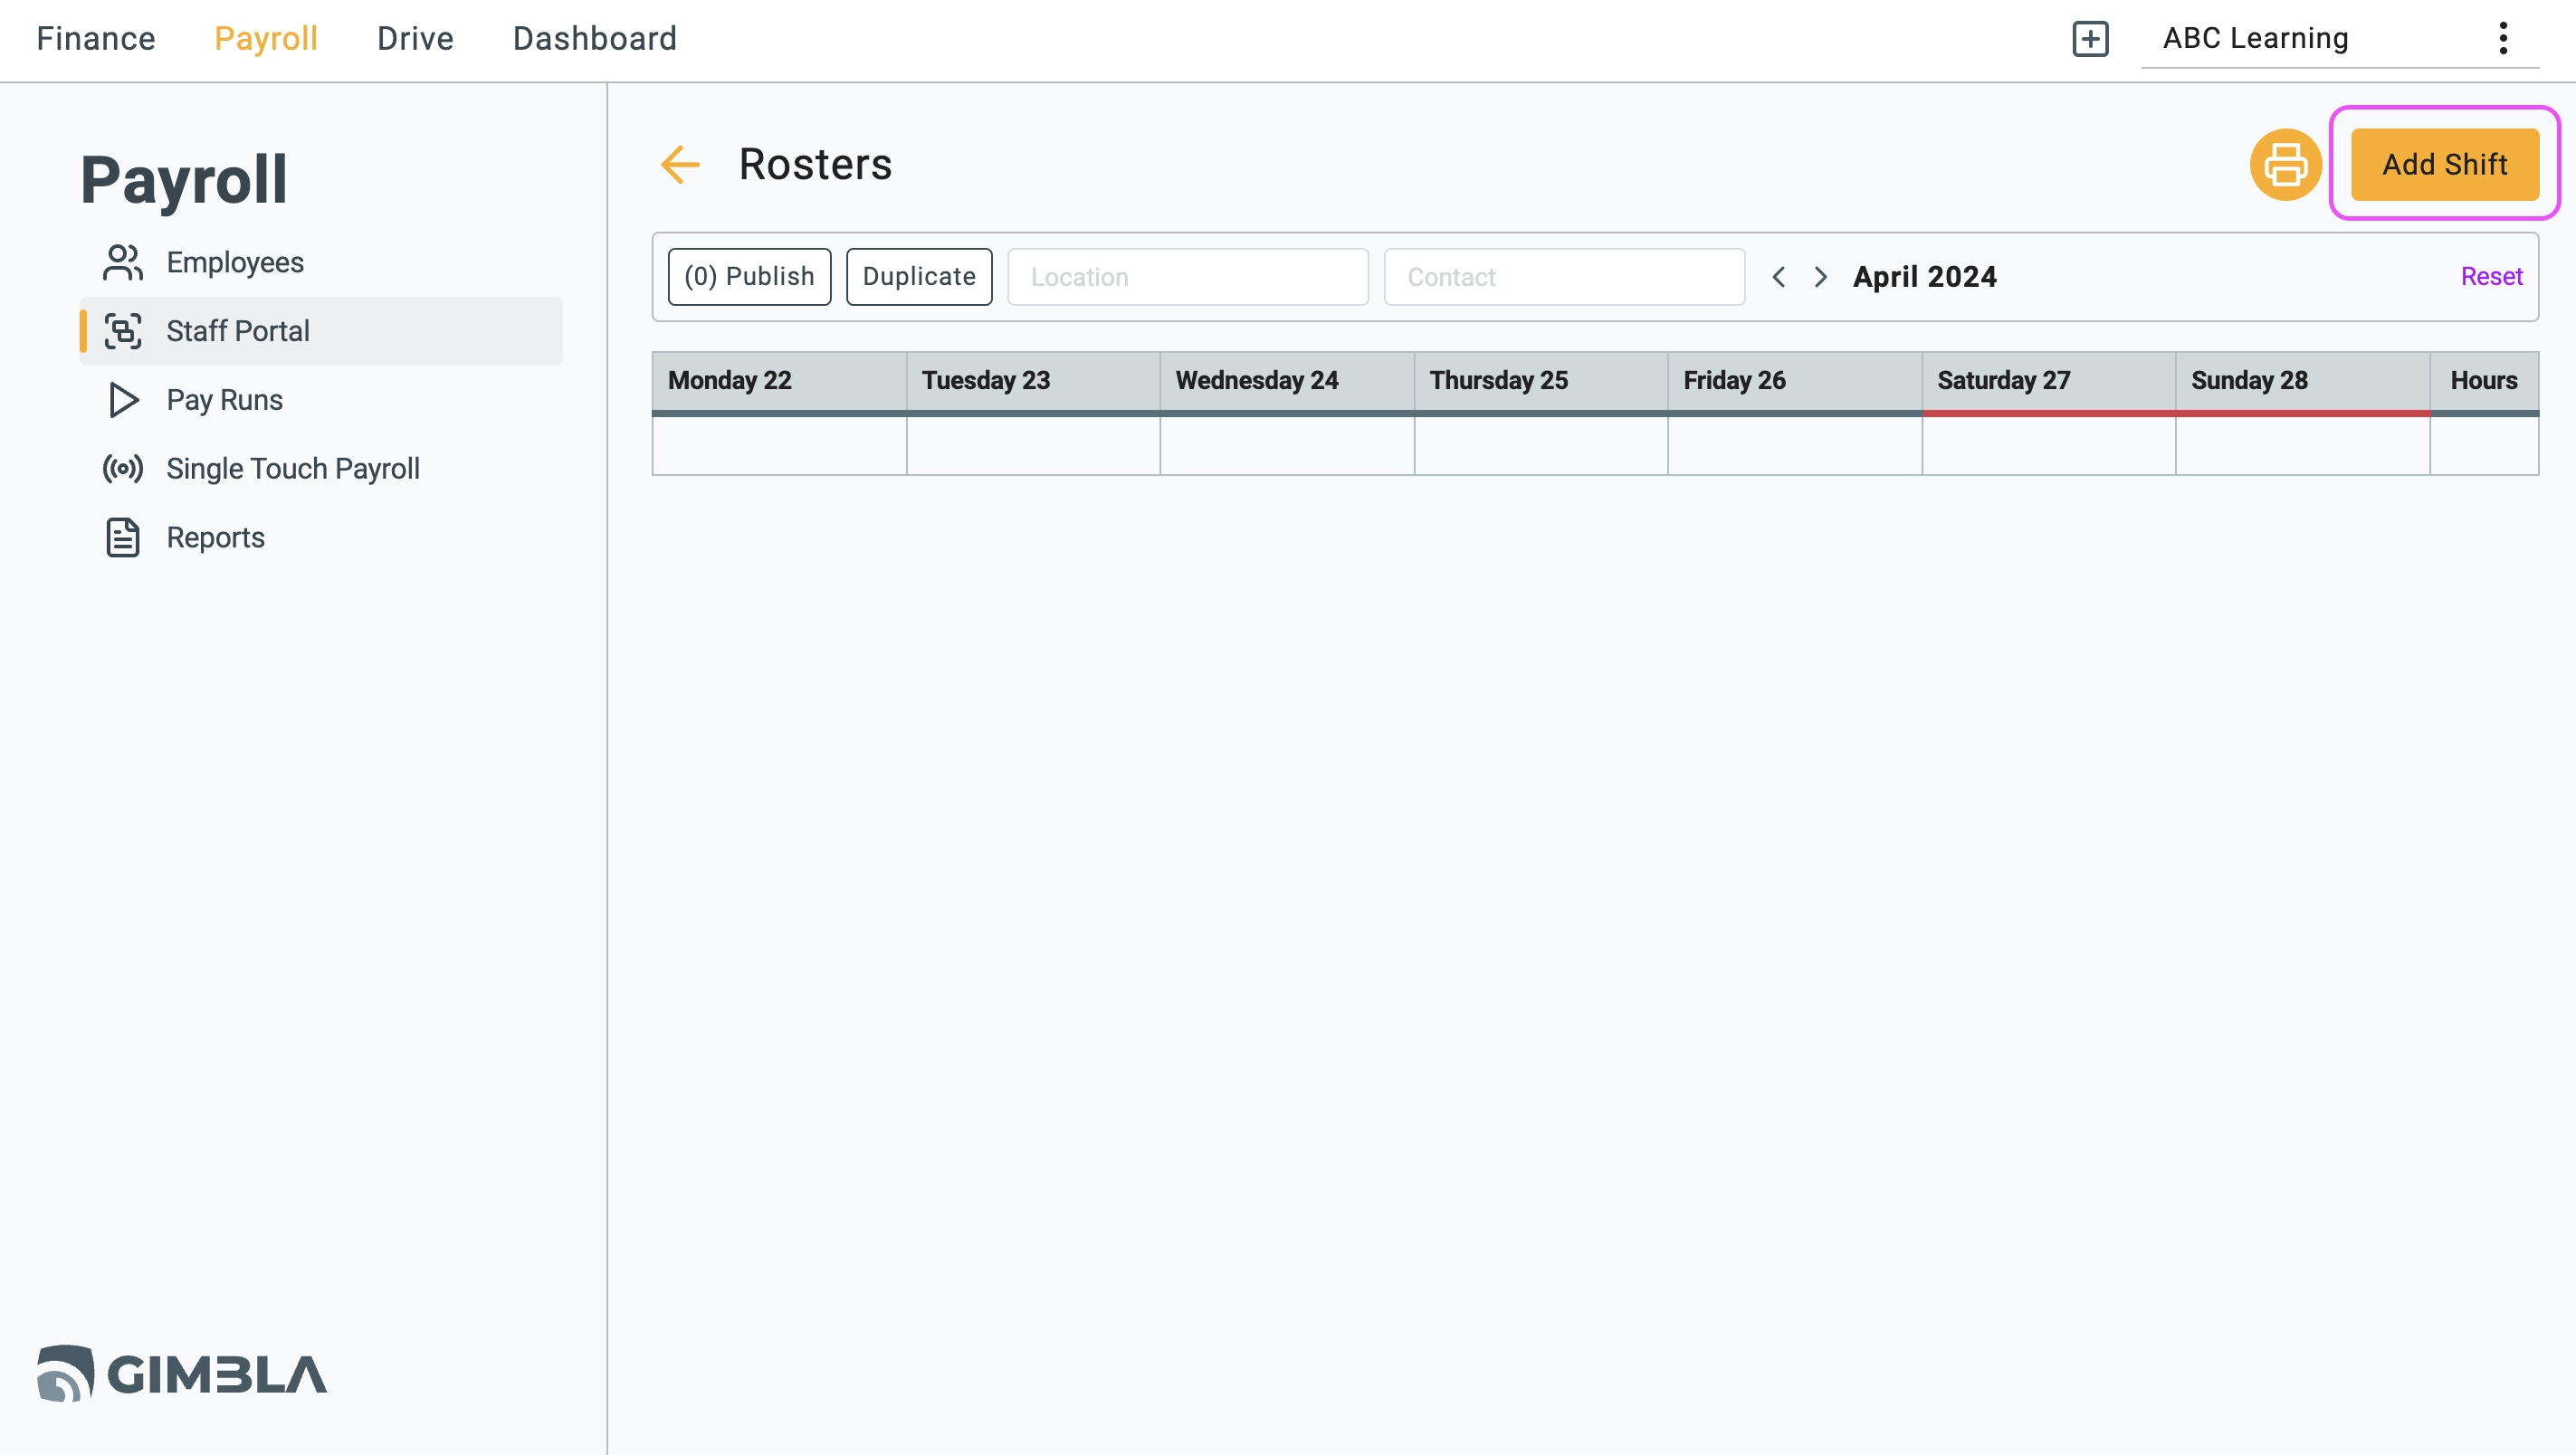
1. Click the Add Shift button from the roster calendar.
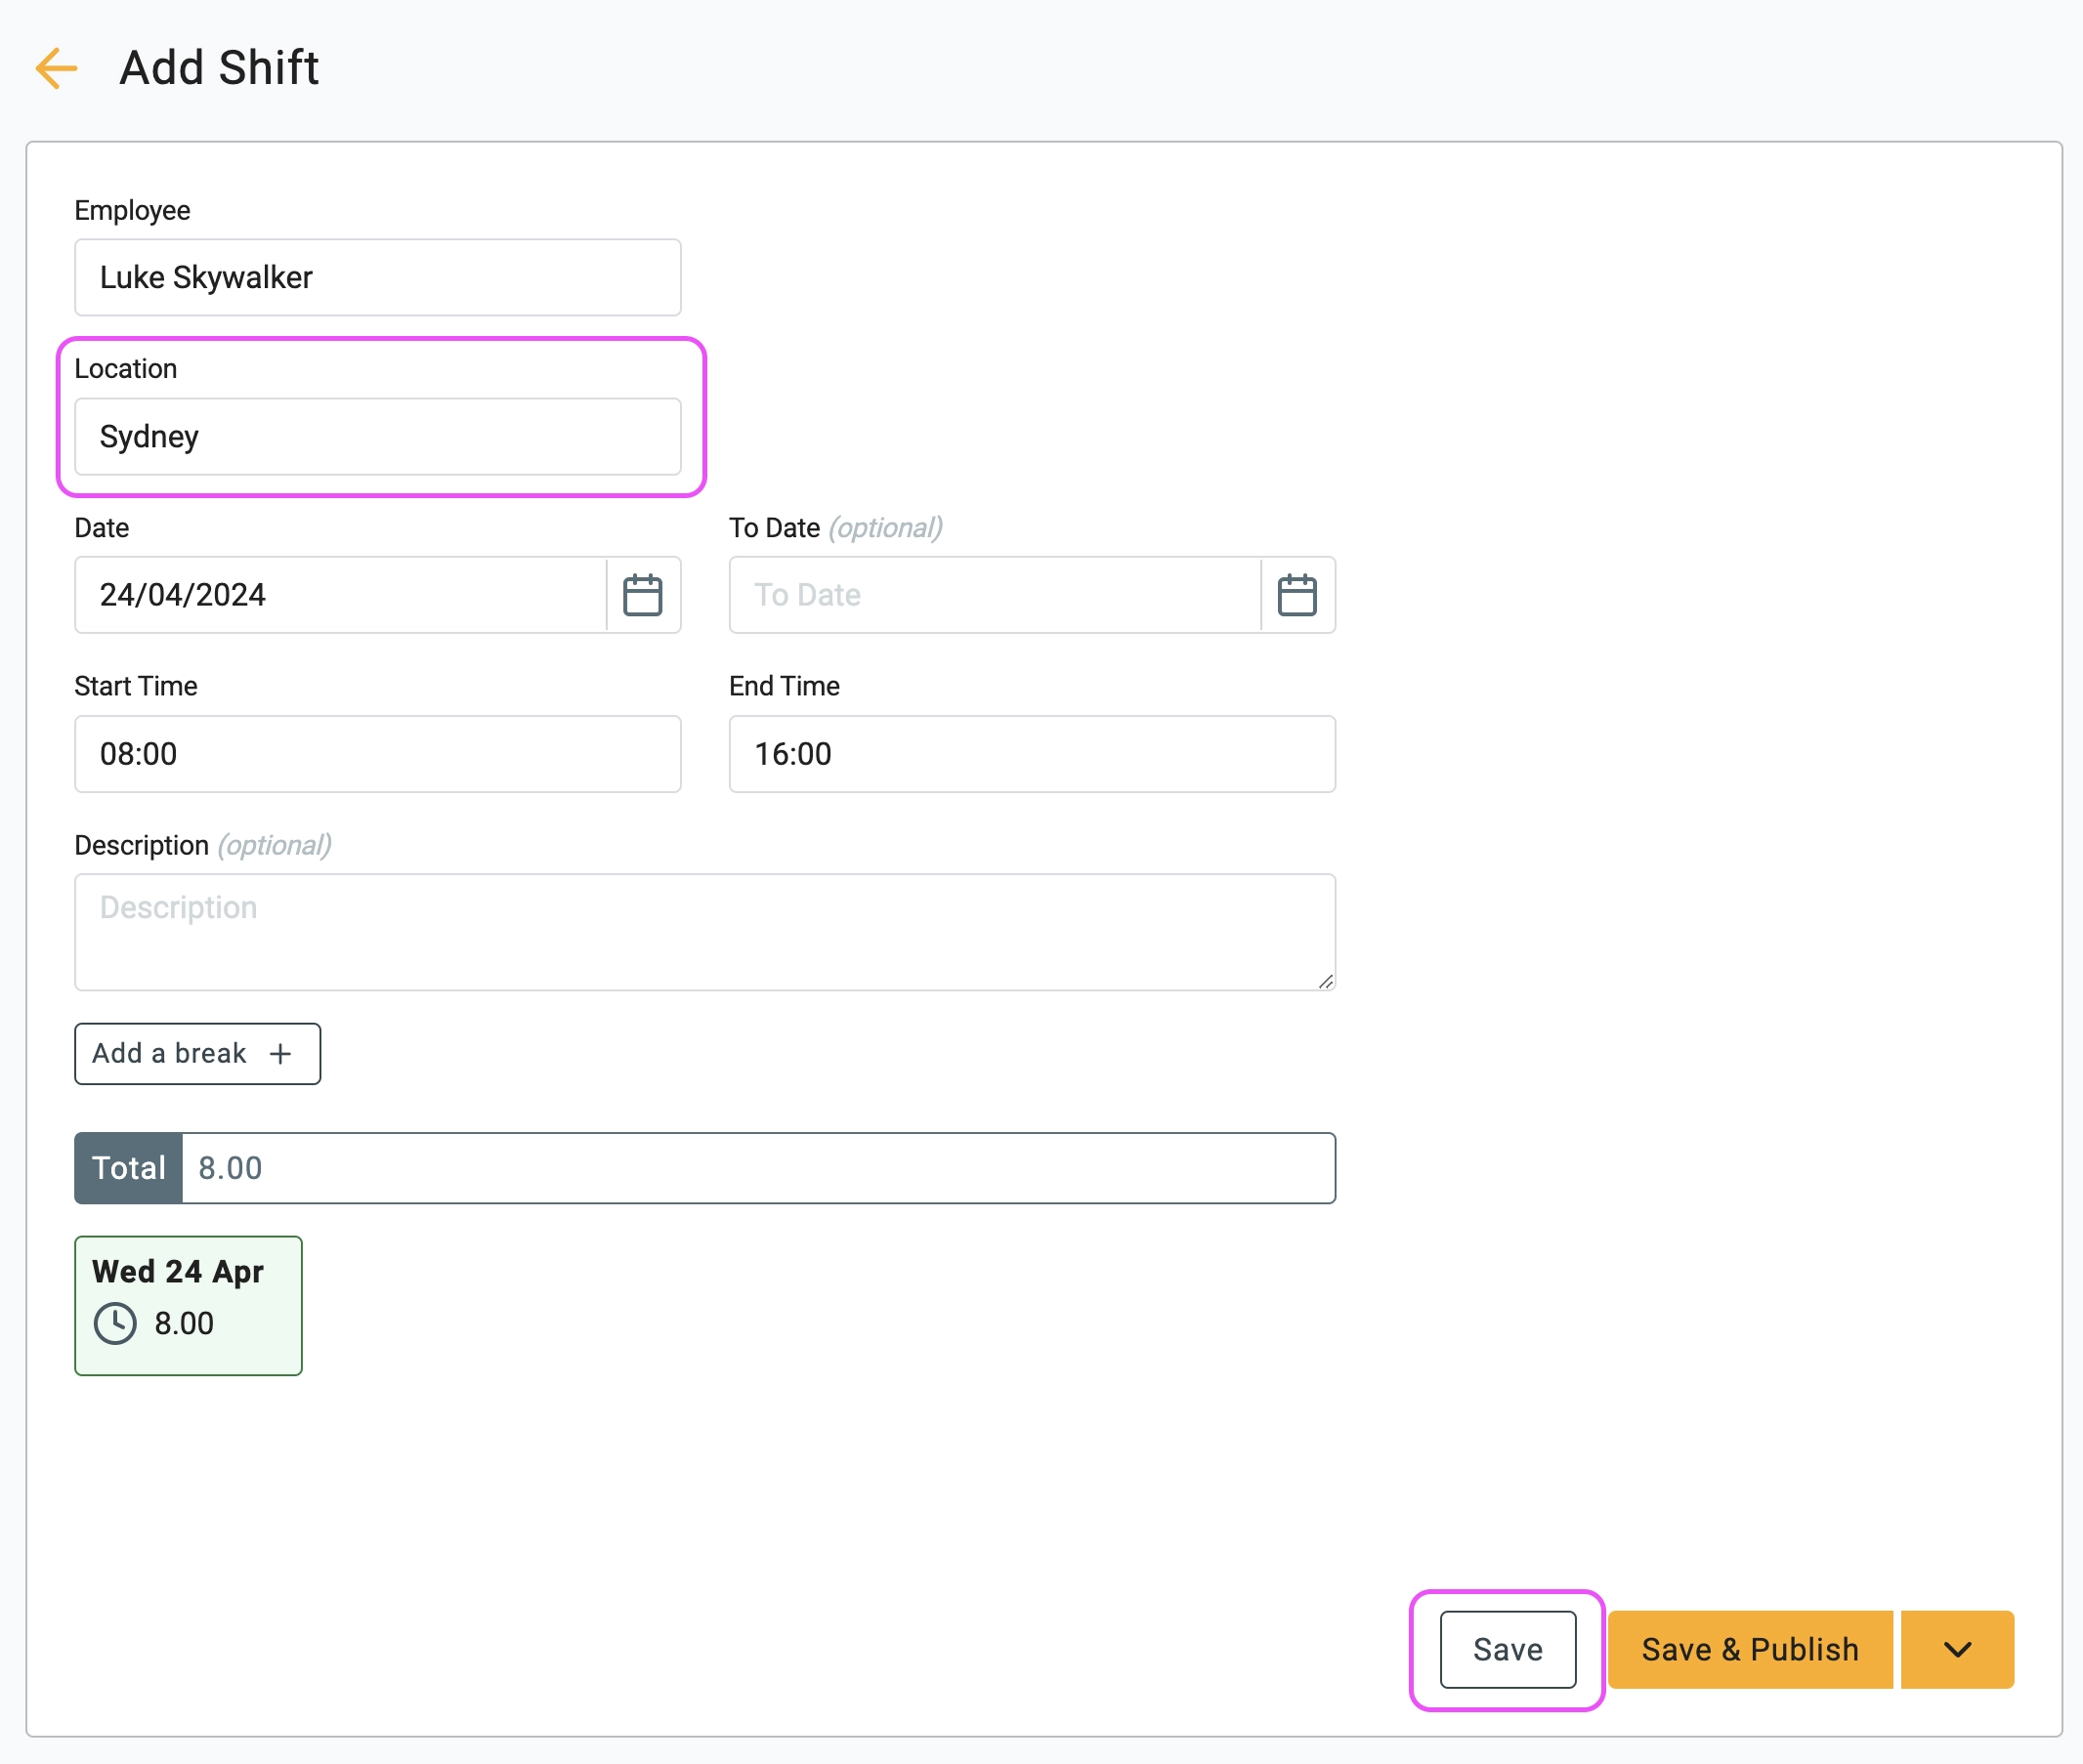
2. Complete the shift details, including the location, and then click Save.
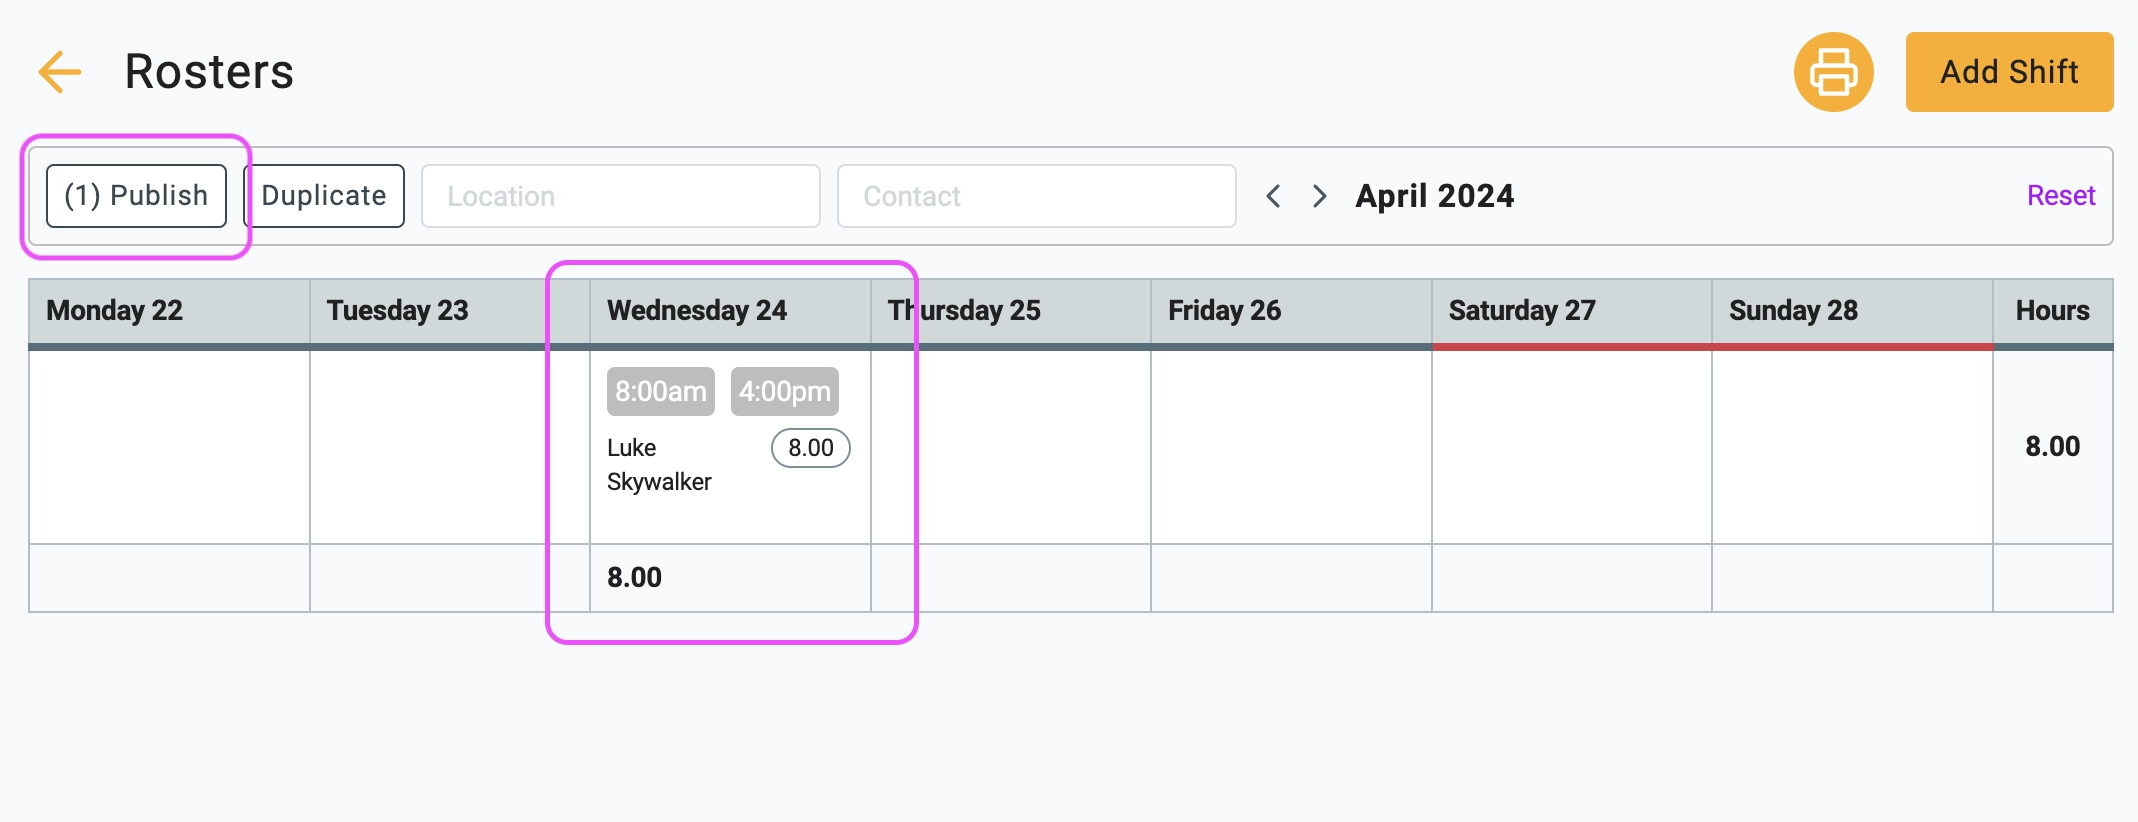
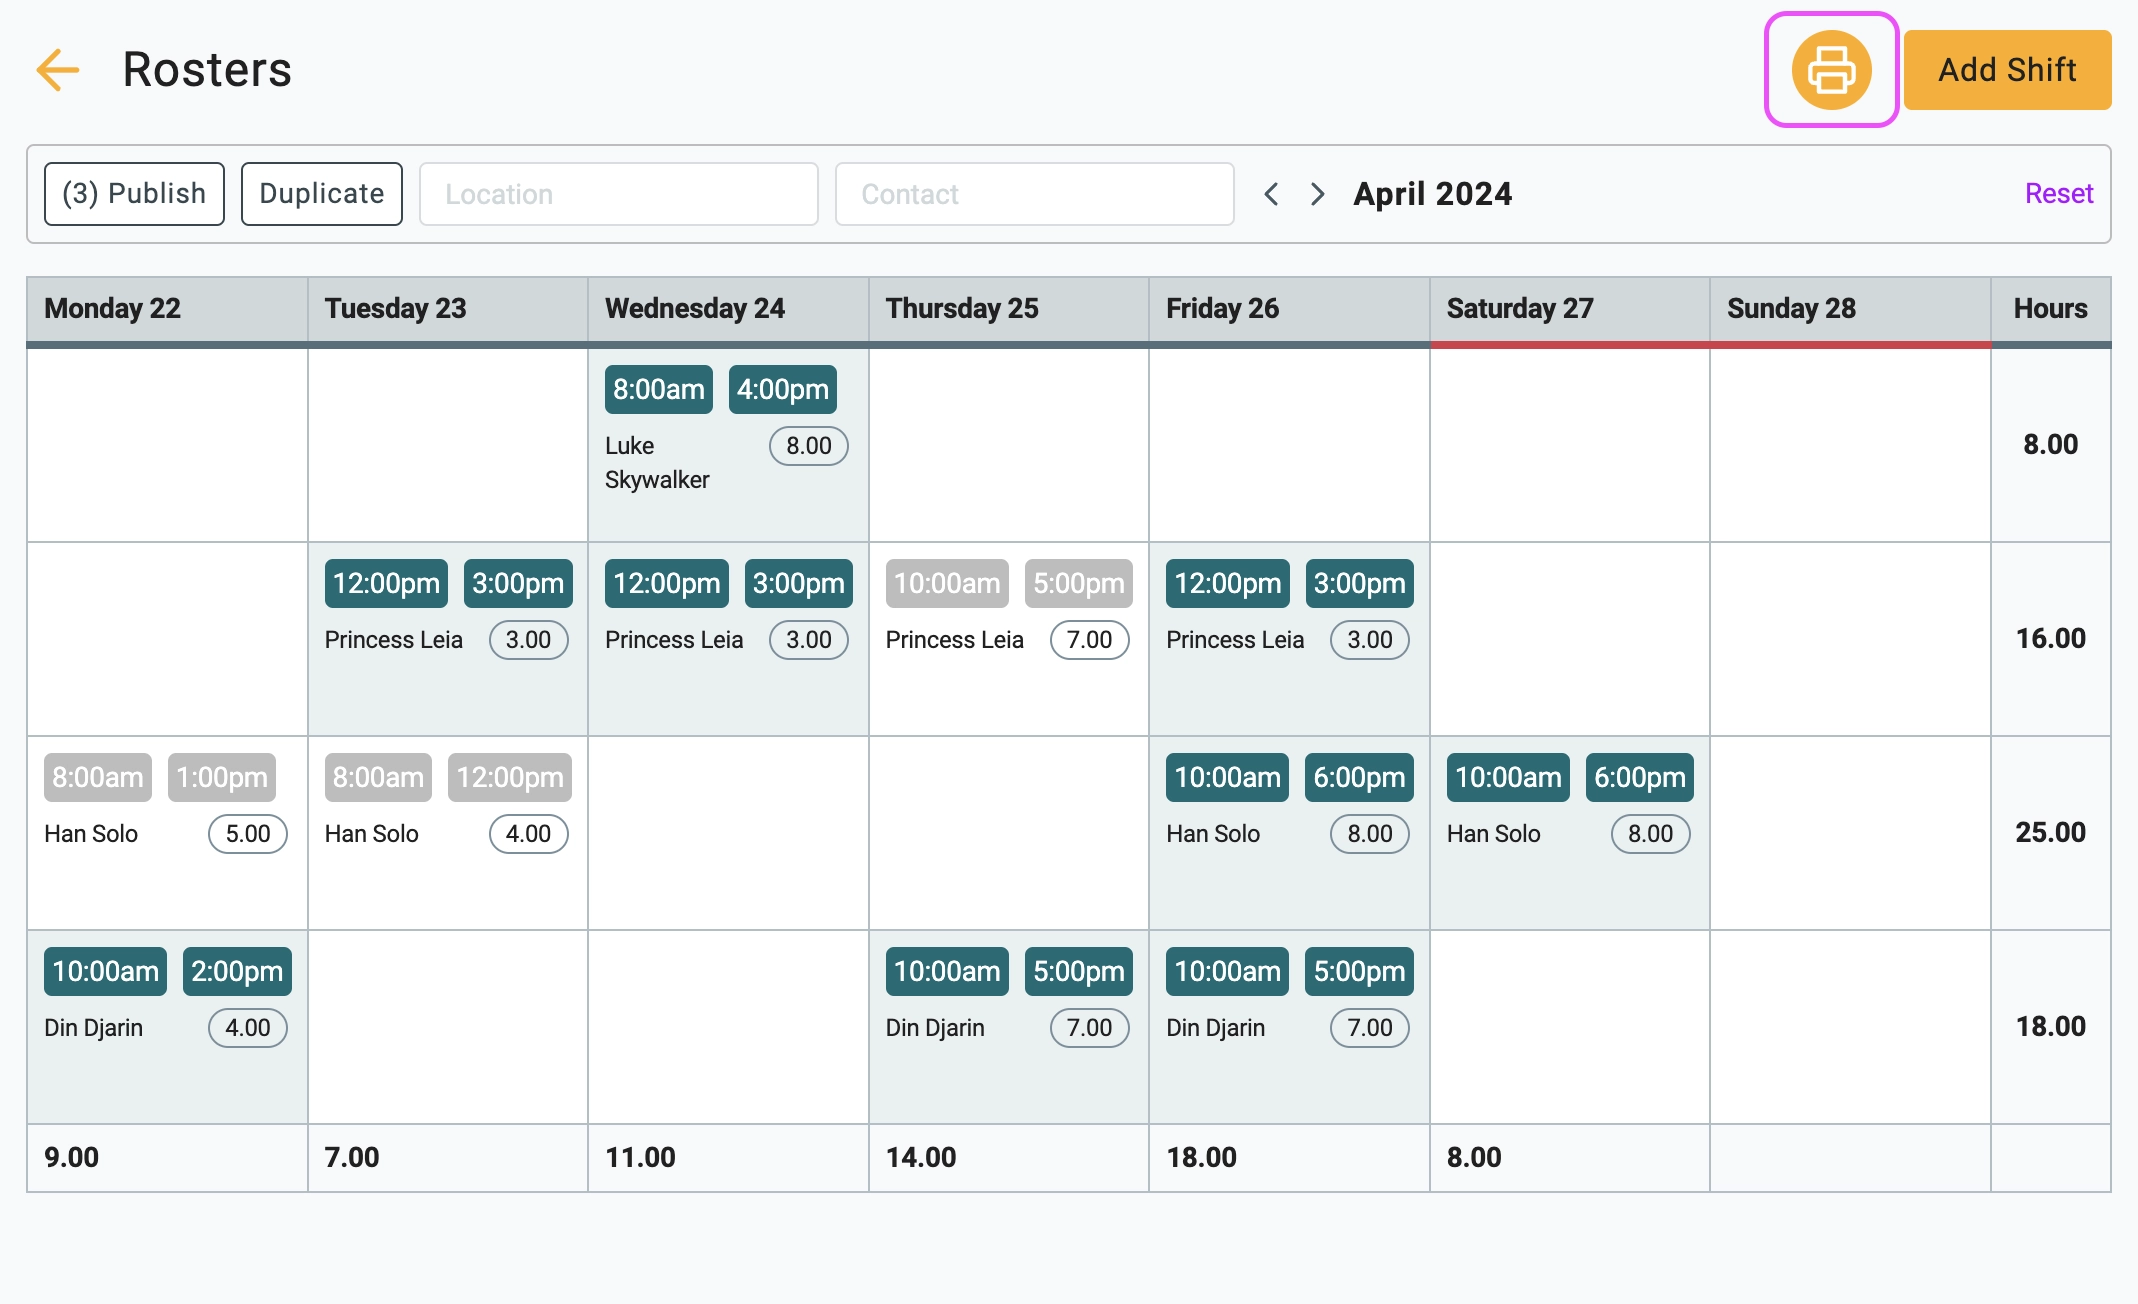
3. Once you save, the shift will appear on the calendar with all the details like Starting Time and Ending Time. The time block will be displayed in gray, letting you know it's currently unpublished and invisible to employees in their Staff Portal. To make it visible, simply click the Publish button. Need a quick check? The number next to Publish shows how many unpublished shifts are waiting to be shared.
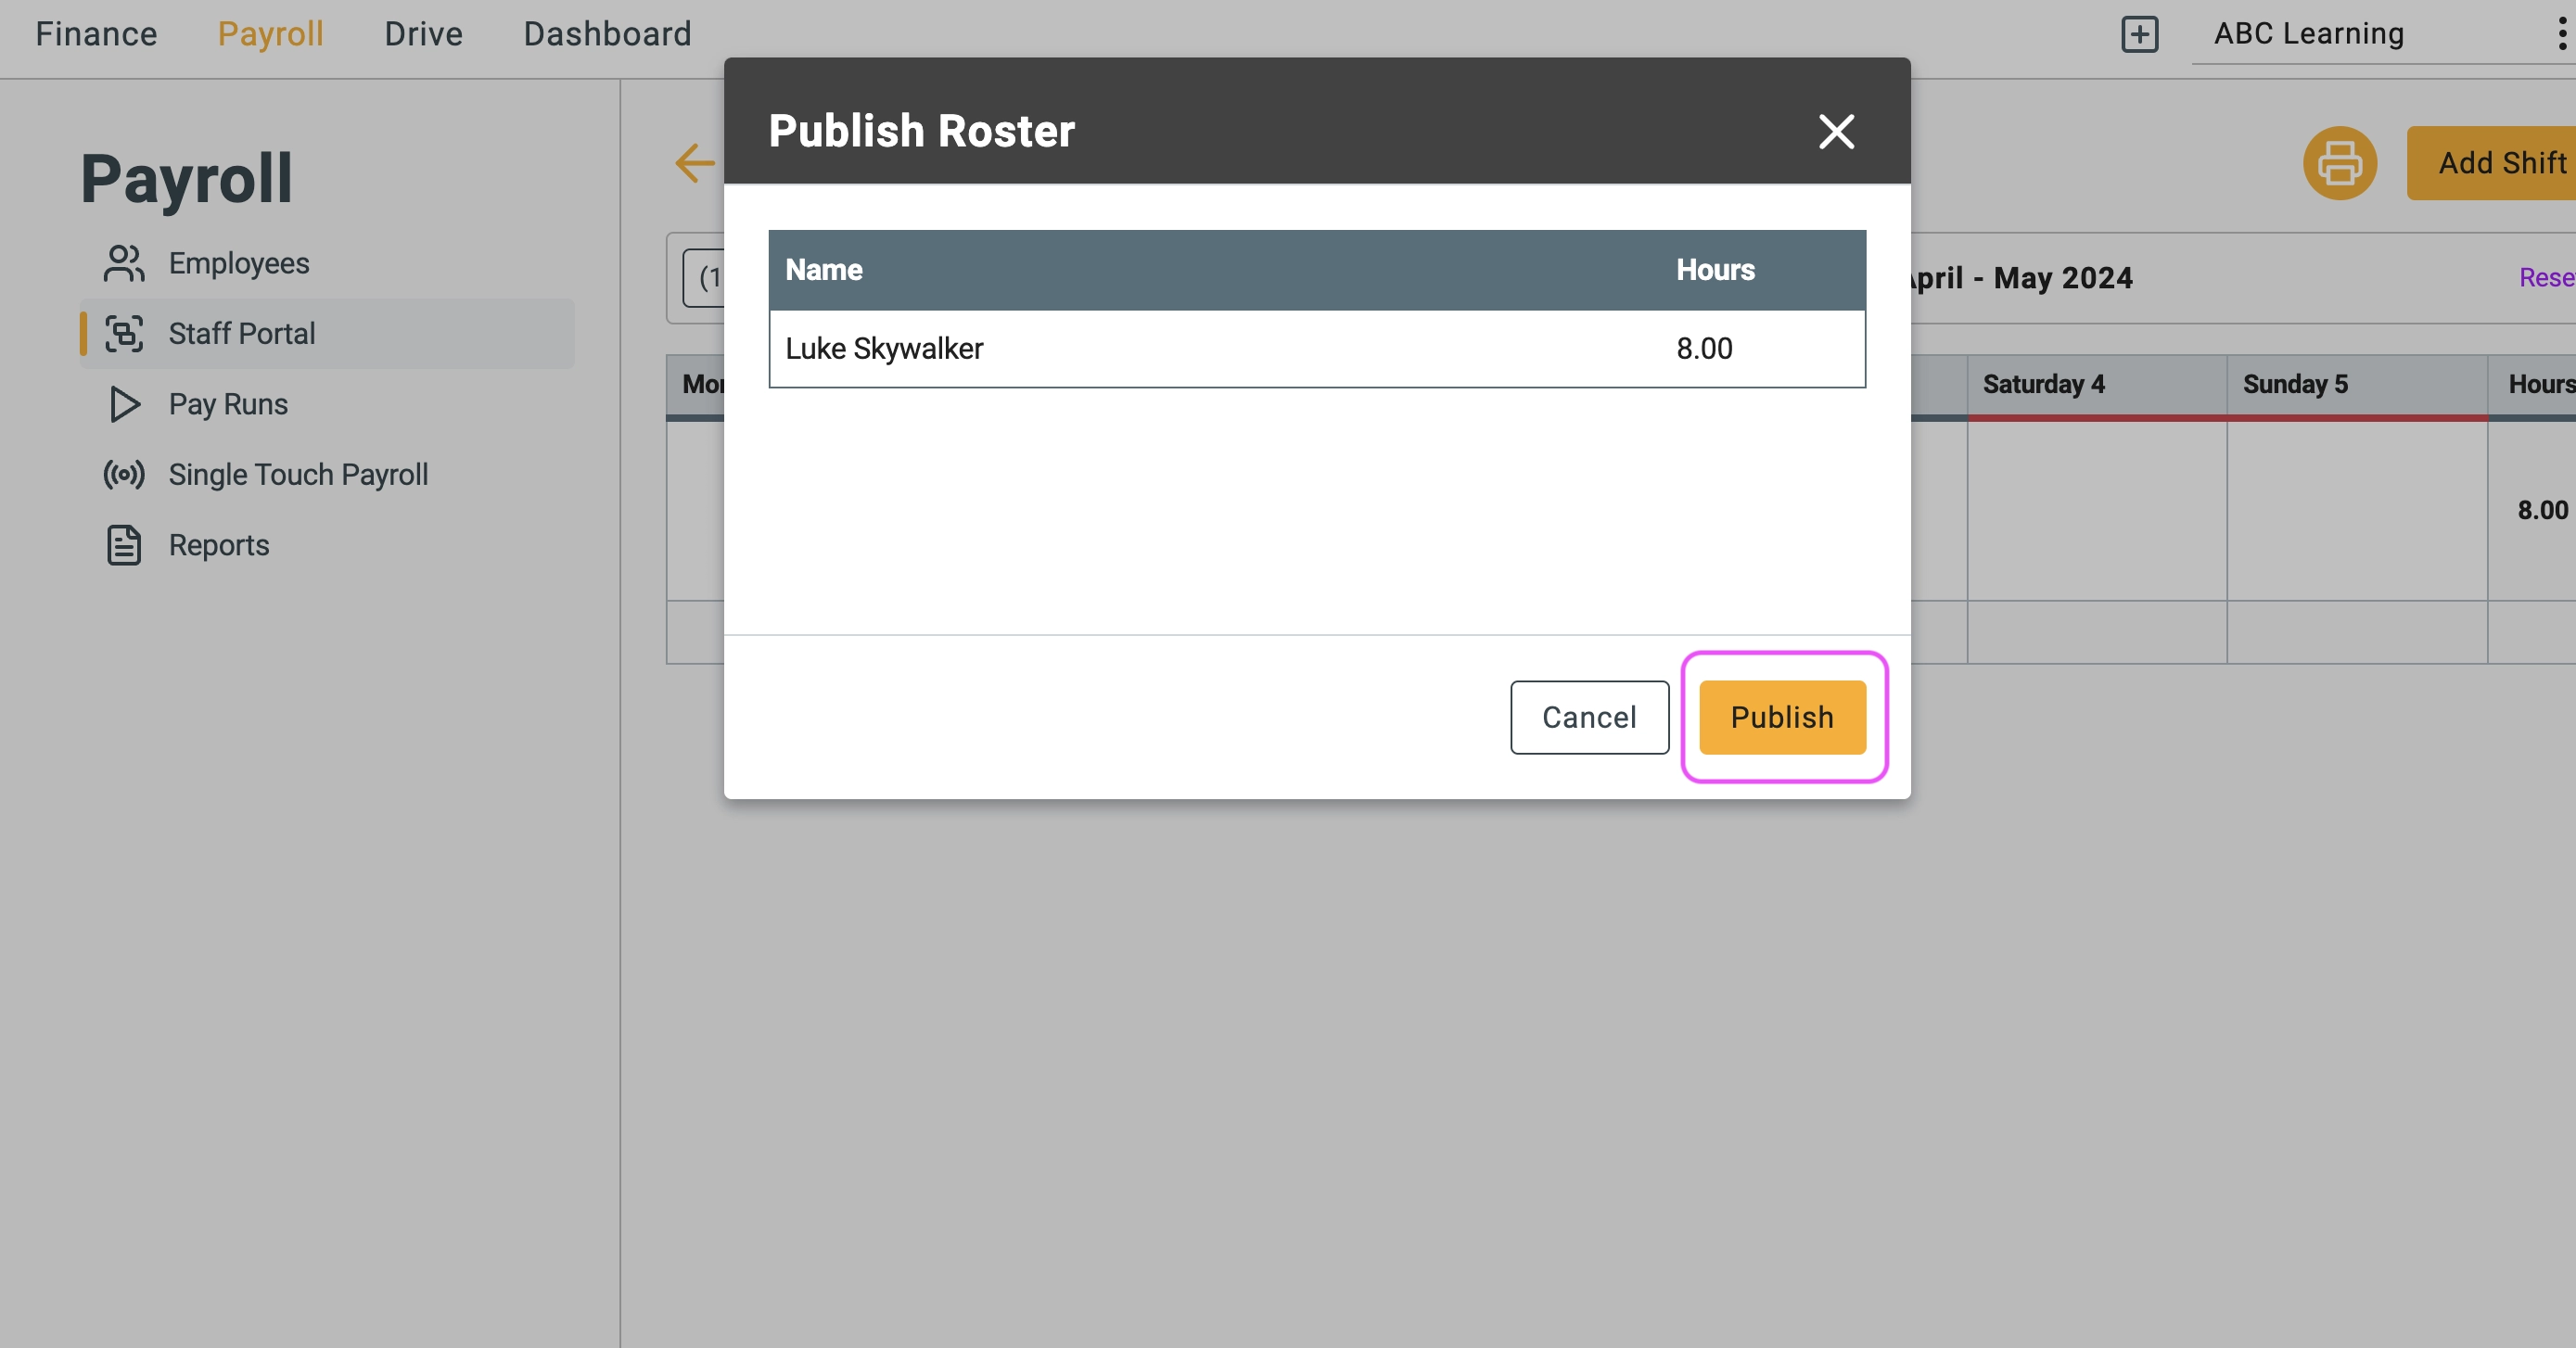
4. Click the Publish button to make it official. This will send the roster to your employees, letting them know their upcoming shifts. You'll also see the total number of hours you're publishing for the current calendar week.
🏁 Results
All set! Your roster appears in a clear, weekly calendar view. Need a hard copy? No problem, you can easily print it to PDF for your records.
⭐ Duplicate
Spending hours recreating the roster every week can be time consuming! The Duplicate feature is your timesaving hero. With a click, it creates next week's roster based on the current one. Just make any tweaks needed and hit Publish.